Create and submit a shipping order
Shipping orders identify outgoing inventory. Once created, the order can be managed from the Orders hub. Shipping orders can also be imported.
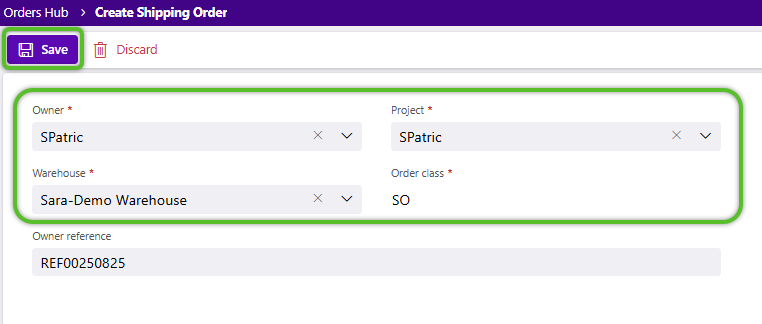
Create a new Shipping Order
1. From the Orders hub, click the option to + Create shipping order.

The Owner, Project and Warehouse will populate automatically, however they can be updated if other options are available. The Order class defaults to a set value and cannot be changed.
2. (Optional): Input a reference number for the Order.
3. Click Save to proceed with the selected options and open the new order.
4. (Optional): Enter additional information on shipping, carriers, and vendor under the Details section that can be opened by clicking the down pointing arrow.
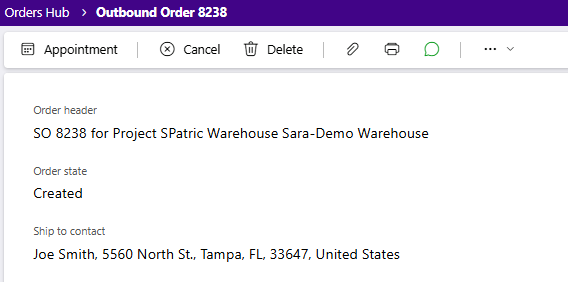
| Order header: | The short name of the Order class assigned to the order, the system-generated Order lookup, followed by the Project associated with the order and the warehouse to order will arrive at. |
| Order state: | The current status of the order in the outbound handling process. |
| Ship from contact: | This is the address associated with the order. Only visible when a Contact has been added or selected. |
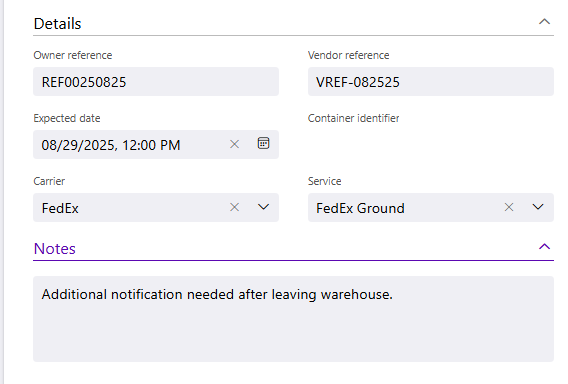
| Owner reference: | The reference number given to the Order for the Owner's reference. |
| Vendor reference: | The reference number given to the vendor for the Vendor's reference. |
| Expected date: | The date the delivery is expected by, if specified in the order's creation. |
| Container identifier: | The Container ID specified for the order. |
| Carrier: | The Carrier specified for the order. (Can only select those Carriers assigned to the Owner) |
| Service: | The Service specified for the order. |
| Notes: | Any Notes for the order. |
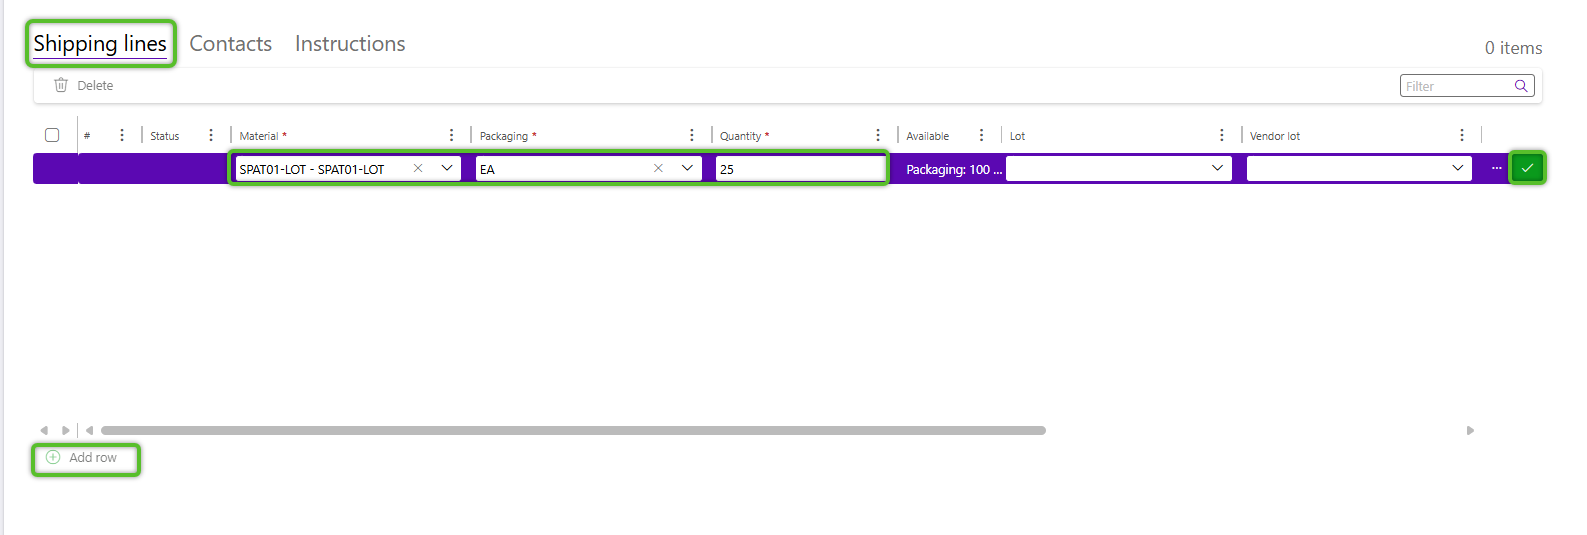
5. Click the green + Add Row option at the bottom of the Lines tab to begin specifying the inventory to be shipped out.
6. Select a Material from the list available to the Project.
7. Select the correct Packaging and enter the required Quantity.
Note
If a Lot is not selected for a Line, the default is the Material 's Allocation Strategy.
8. Click the checkmark at the end of the row.
Repeat steps 5-8 to add more order Lines.
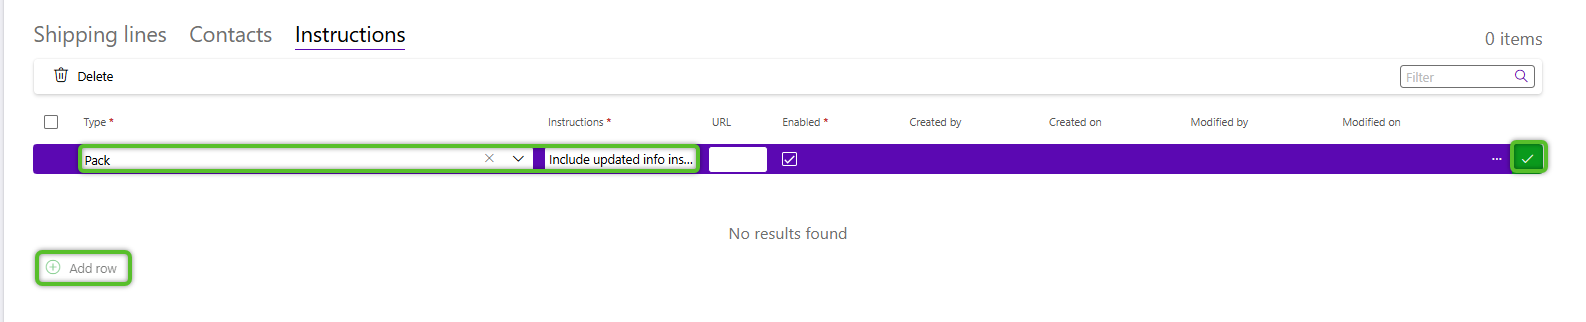
9. (Optional): Click the Contacts tab to add contacts and/or the Instructions tab to add Instructions.
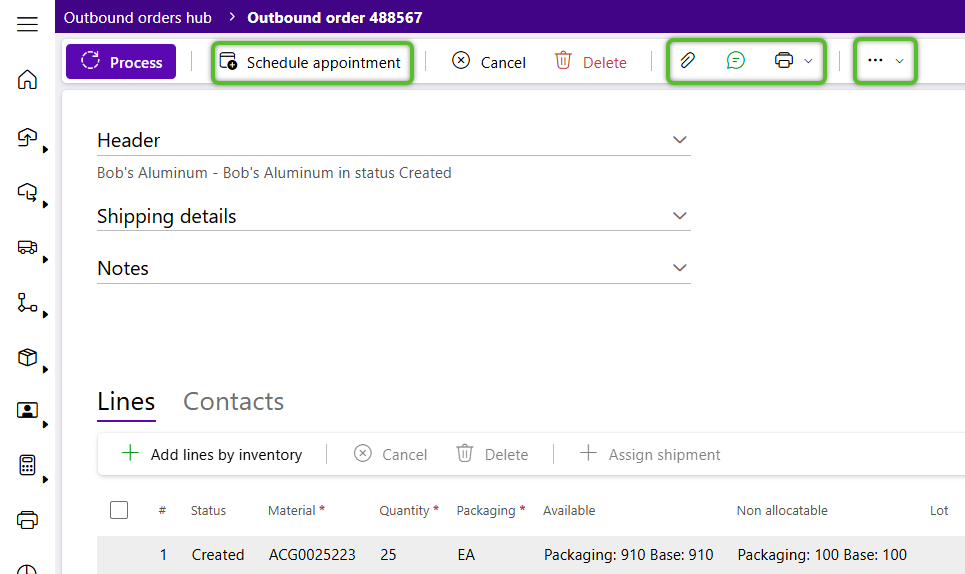
10. (Optional): Use the Order toolbar options to Add a Dock Appointment, Add attachments, or use the Discussion tool to leave a comment for the warehouse when the order is submitted.
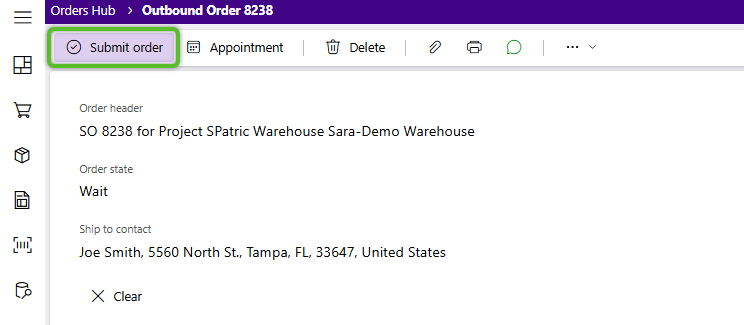
12. Finally, when the order is ready and you want to send it to the Footprint WMS to manage, click the Submit order button.
Note
The warehouse can't see the order until it is submitted and in Created status.
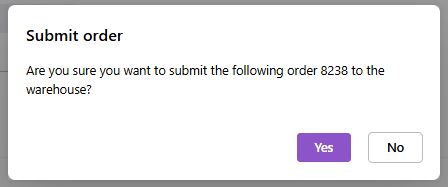
12. In the confirmation pop-up, click Yes.
Now that you've created and submitted the order it will be visible to the warehouse's Footprint WMS to begin managing. You can find it in Created status on the Shipping orders tab of the Orders hub and the Orders Dashboard.
| Last Updated: |
| 09/04/2025 |
Copyright © 2026 Datex Corporation