Subscribe to a report
One of the highlights of the Reports hub is the ability to set up a subscription to a report for yourself. You'll be able to control details such as how often the report is sent and its format.
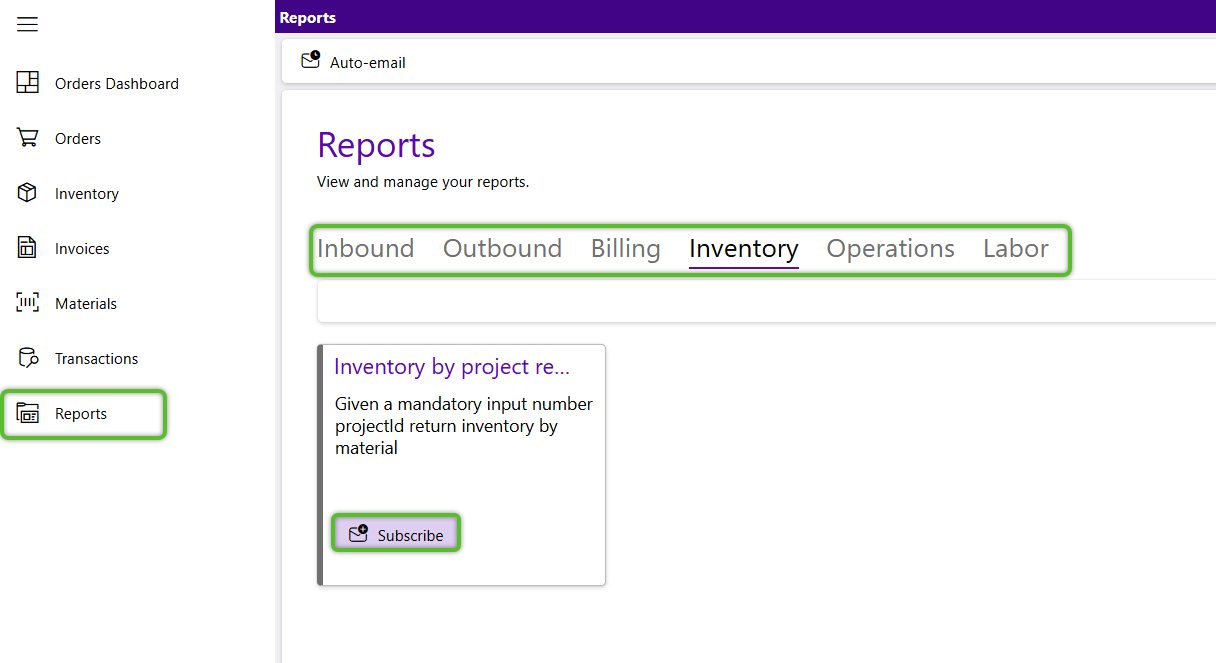
1. Open the Reports hub and navigate through the tabs to locate the report you wish to subscribe to.
2. Click the Subscribe button to open the subscription flyout for the chosen report.
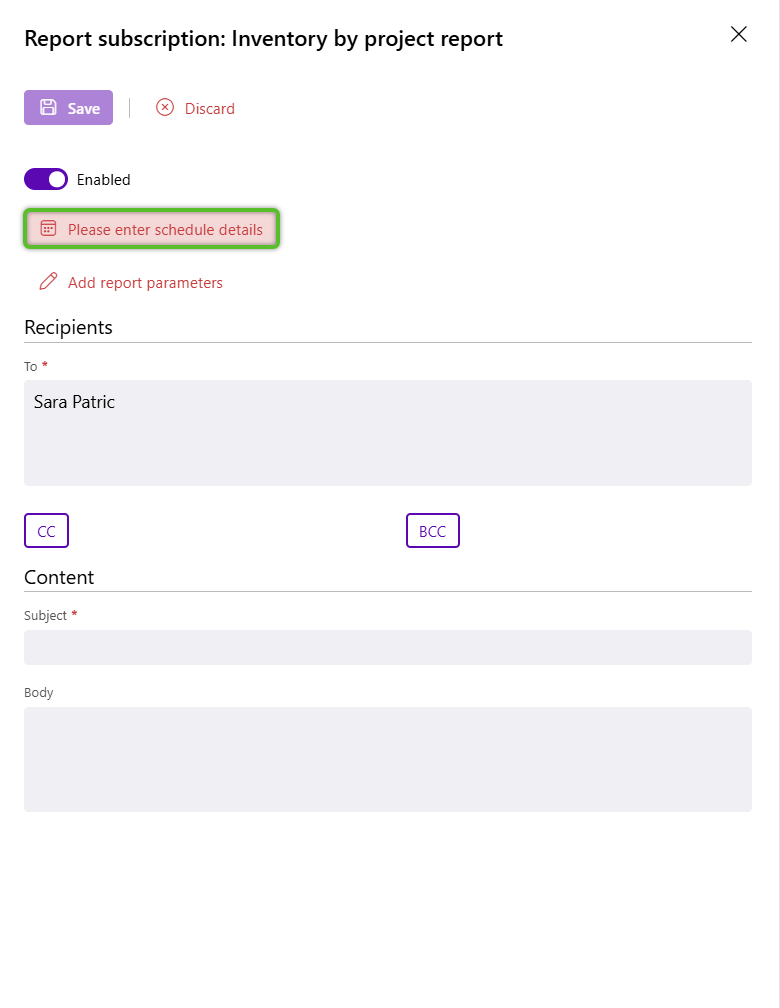
3. (Optional) If you do not want to use this subscription yet, make sure to toggle off the Enabled button. Report subscriptions will default to Enabled.
4. Click the Please enter schedule details button to open the frequency flyout.
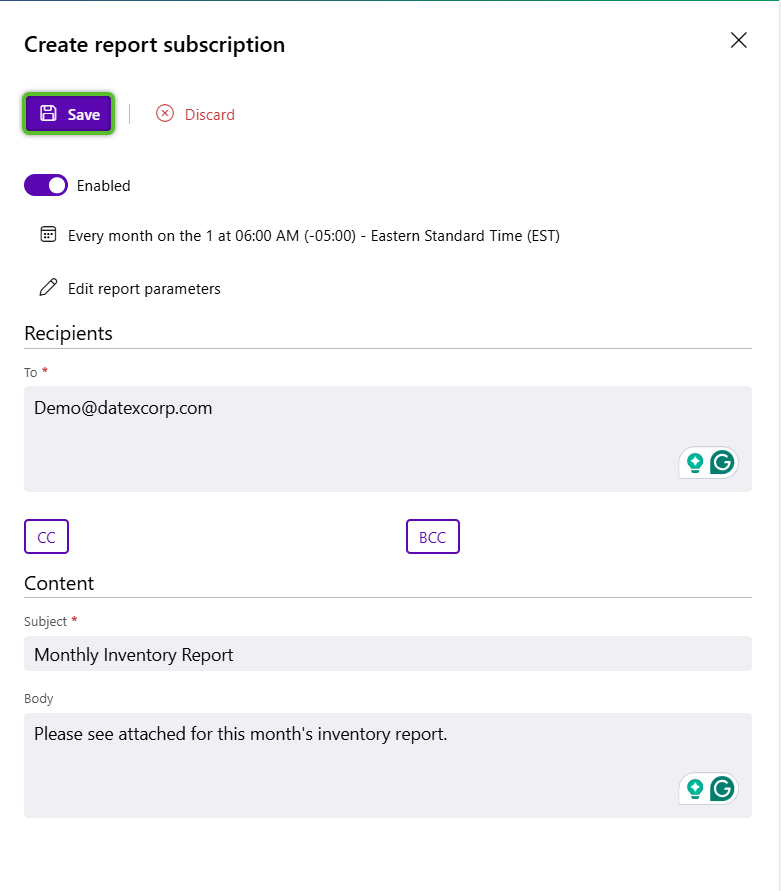
5. Select the frequency of the subscription - Daily, Weekly, or Monthly - then configure the specific timing of your choice. For more information on the different frequency options, please reference the Reports guide or open the relevant drop down below.
Set the frequency in days a report is sent. For example, a daily report would be set to repeat every "1" days.

| Repeat every (Days): | The number of days that will pass before a report subscription will be triggered and sent out. |
Choose between the two daily frequency settings - Occurs at or Occurs every. Occurs at will allow you to set a specific time on the triggered day cadence to send out the report (For example every two dates at 0600 AM Eastern Standard Time. Occurs every allows you to set up a report to potentially send multiple times a day as it includes additional minute or hour frequencies.
Time frequency: Occurs at settings

| Time: | The time the report will be triggered to be sent out. |
| Time zone: | The time zone the selected time will be under. |
| Country: | The country that contains the time zone. It is recommended to select this field before setting the time zone to reduce the number of time zone options to just those in the selected country. |
Time frequency: Occur every settings

| Time amount: | The amount of time before the report will be triggered and sent out. |
| Time measure: | The time measure, minutes or hours, for the time amount. |
You will need to select the specific day(s) of the week the subscription will be sent out. Multiple days can be selected.
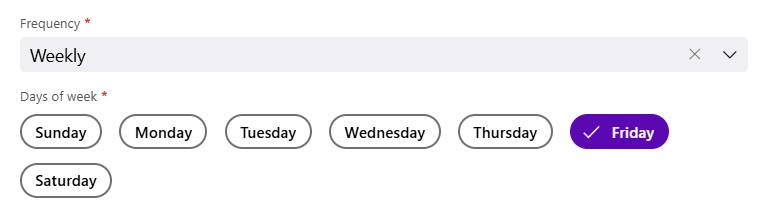
| Days of week: | The day(s) of the week the report will be triggered and sent out. |
Time frequency settings for selected day(s)
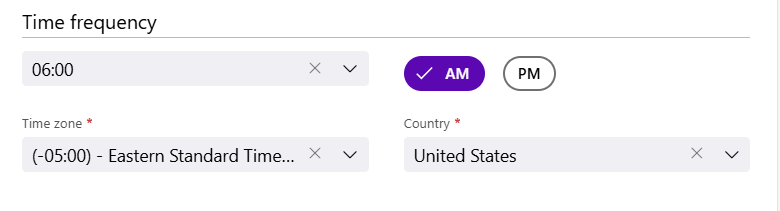
| Time: | The time the report will be triggered to be sent out. |
| Time zone: | The time zone the selected time will be under. |
| Country: | The country that contains the time zone. It is recommended to select this field before setting the time zone to reduce the number of time zone options to just those in the selected country. |
You will need to select the specific date(s) of the month the report will trigger on. Multiple days can be selected.
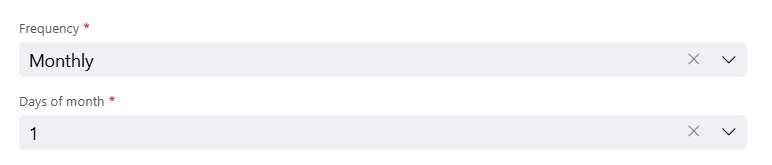
| Days of month: | The date(s) of the month the report will be triggered and sent out. |
Time frequency settings for selected date(s)
| Time: | The time the report will be triggered to be sent out. |
| Time zone: | The time zone the selected time will be under. |
| Country: | The country that contains the time zone. It is recommended to select this field before setting the time zone to reduce the number of time zone options to just those in the selected country. |
6. Once all your frequency settings are configured, click the Confirm button to return to the subscription flyout.
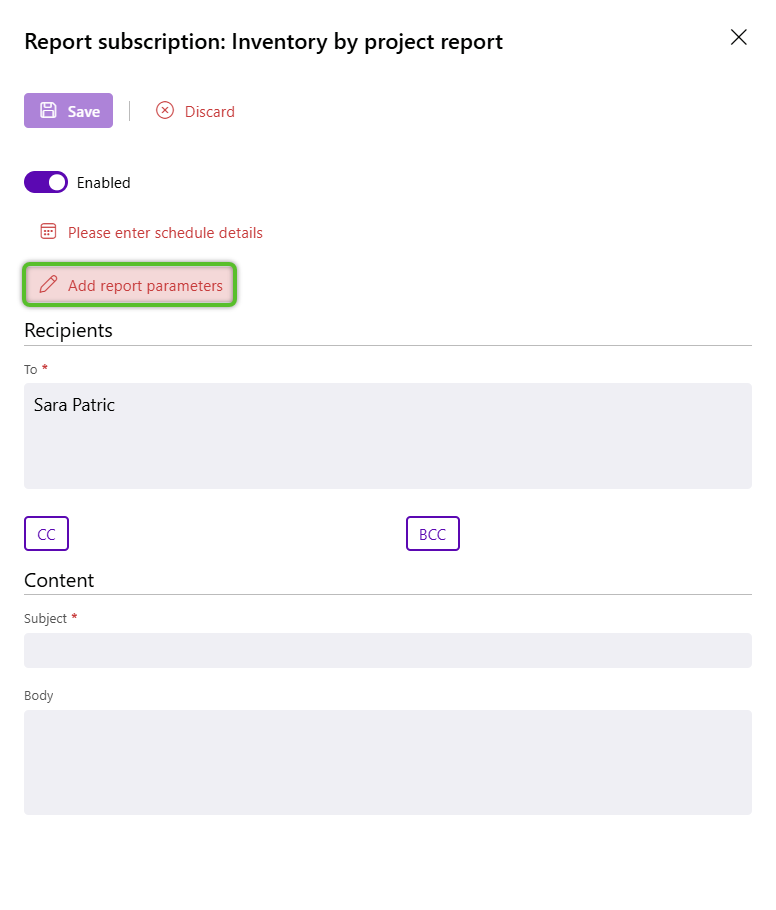
7. Click the Add report parameters button to open the parameter flyout.
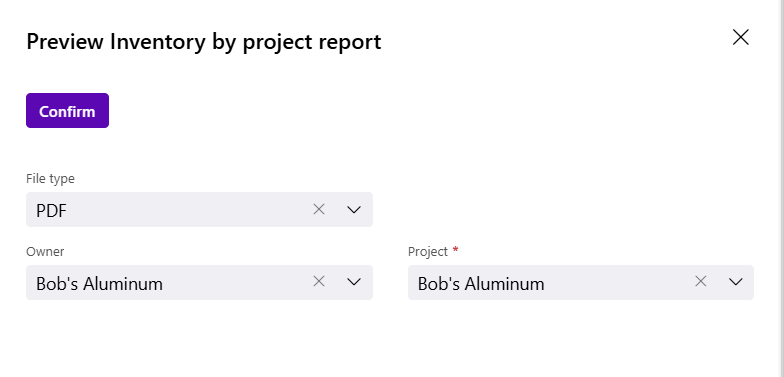
8. Depending on the report, parameters will vary, except the File type parameter. Use the File type field to select the format you want the report to be sent in. Current options are Excel, PDF, HTML, and CSV.
Please note for some reports, parameters may be required, while for others they will not. In cases where there are required parameters the Add report parameters button will update to indicate there are required parameters after you set a subscription schedule. Additionally, when you open the parameters flyout required fields will be marked with a red asterisk like anywhere else in Footprint Portal. Examples of parameters may include a date range for the report or a specific warehouse to report from.
9. Once all your parameters have been set, if any, click Confirm.
10. Enter your, or the recipient's, email address in the To field. While a check will occur that the email address entered has all the components that make it a valid email address, it is not checking that it's an accurate email address.
Multiple email addresses can be entered, separated by a comma, space, semi-colon. or a new line.
11. (Optional) If needed, you may click the CC or BCC buttons to open fields for adding email addresses to be carbon copied or blind carbon copied.
12. In the Content section, a Subject much be provided for the email. The Body for the email is optional.
13. Once you have completed all setup to your satisfaction, click the Save button.
| Last Updated: |
| 10/15/2025 |
Copyright © 2026 Datex Corporation