Create an Inbound Load Container
Load Containers group Orders of incoming or outgoing Materials together, specify Containers for the Inventory, and create a Loading Sequence for the containers.
Prerequisites
- Warehouse
- Locations
- Materials
- Container Types
- Inbound or Outbound Shipment
1. Click Transportation in the left navigation menu, then select Load Containers.
The Load Containers Hub will display both Inbound and Outbound Load Containers.
2. Click the + New Load Container option in the top toolbar.

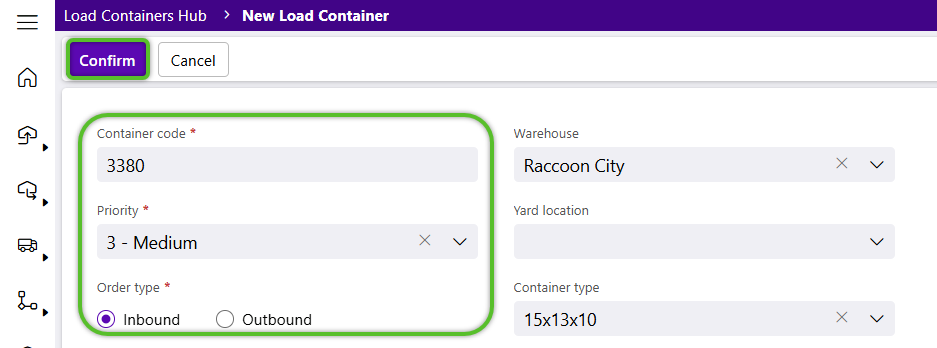
In the Create a Load Container window, the Lookup Code is populated and can be updated.
3. Select a Warehouse if one is not already set.
4. Set the required Priority for the Inbound Load Container.
5. Enter the optional Yard Location.
6. Select the required Order Type, indicating it's an Inbound Load Container.
7. Select the optional Container Type.
8. Click the Confirm button to create the new Inbound Load Container and continue adding details and Orders.
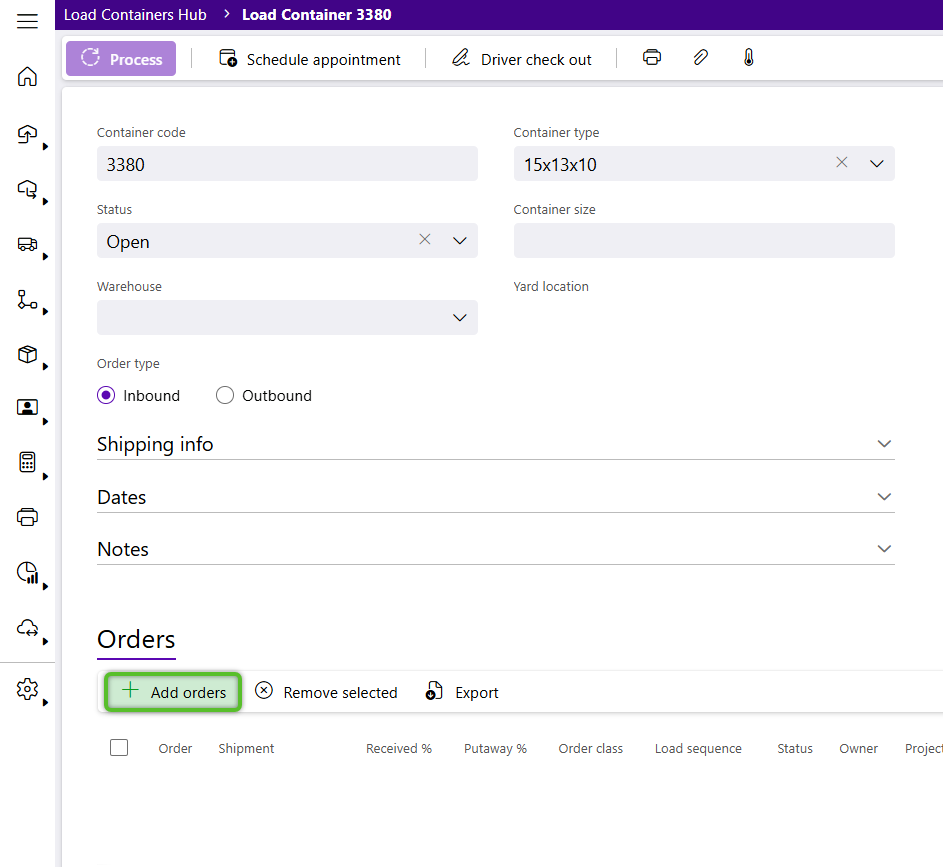
9. Add optional Shipping Info, such as the Carrier, Trailer Number, and Notes.

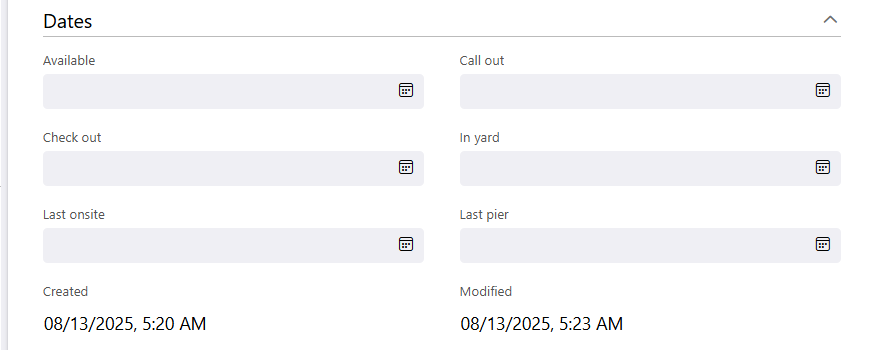
10. Set optional Dates related to the Inbound Load Container, such as Available, Call Out, Check Out, and Last Onsite.
11. Add Orders to the Load Container by clicking the + Add Orders option in the Orders tab at the bottom.
Tip
If creating a Load Container during the creation of an Order, the Order will automatically be added to the Container, so it is not necessary to add it here.
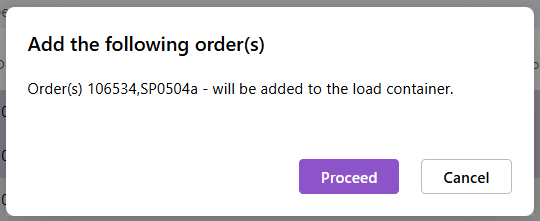
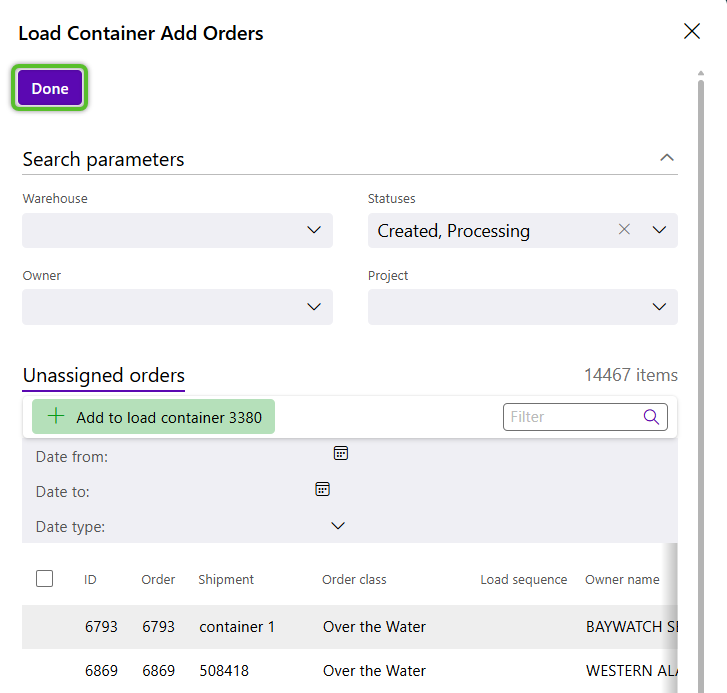
12. In the Load Container Add Orders window, locate and select the Unassigned Orders for the Load Container, then click the + Add to Load Container # option.

13. Review the Orders to be Added to the Load Container, then click the Proceed button.
14. Click the OK button in the confirmation window.
15. Continue adding Orders to the Load Container and when ready, click the Done option at the top.
The Orders assigned to the Load Container will be listed in the Orders tab.
16. To specify the sequence in which to Load or Receive the Orders listed in the Orders tab, click into their Load Sequence column, enter the appropriate number, then click the green check mark at the end of the row. Do this for each Order.

Each number in the sequence corresponds with a stop in the delivery. For example, for Inbound Orders, the first in the sequence will have been the last stop of the delivery.
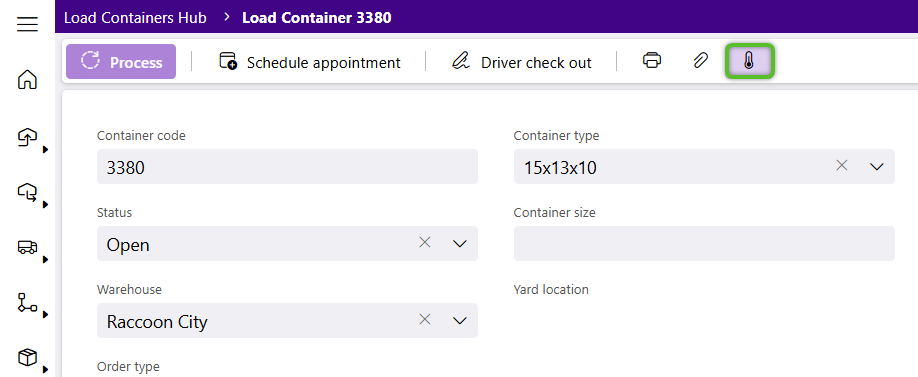
17. To add a Temperature Reading for the Load Container, click the temperature icon on the Load container toolbar and record the reading on the flyout.
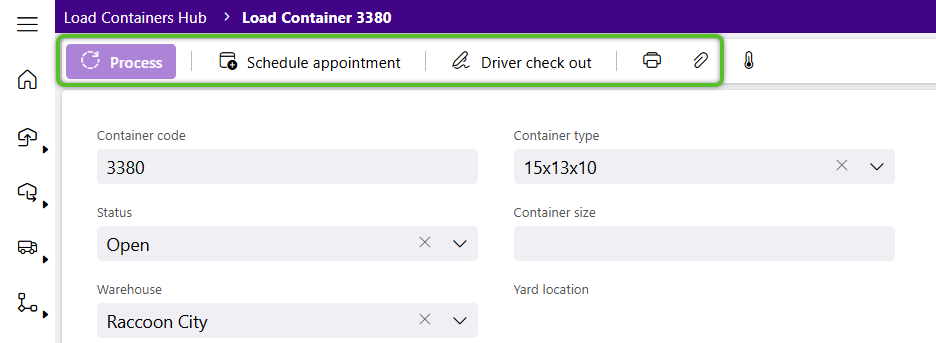
18. To Create a Dock Appointment for the Load Container, Process the Load Container, add Attachments, and Print related files, use the icons in the top toolbar.
The new Inbound Load Container will appear in the Load Containers Hub and be available for use.
| Last Updated: |
| 08/13/2025 |
Copyright © 2026 Datex Corporation