Import Outbound Orders
Imported Outbound Orders will appear alongside other outbound orders in Footprint for review and management purposes.
Please Note
-
For the most comprehensive import, we recommend downloading the latest export file with up-to-date features and fields.
-
The import process is intended for creating new records. Enter as many details as possible when importing, as attempting to update existing records will result in an error.
-
All date values must follow the MM/DD/YYYY format. If the spreadsheet contains dates, please double-check they are formatted accordingly before proceeding with the import process.
-
Imports are limited to 5000 lines. Please break down larger imports into files with no more than 5000 lines.
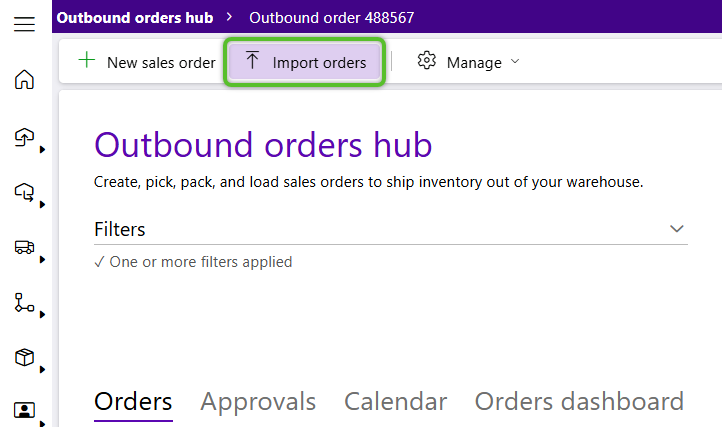
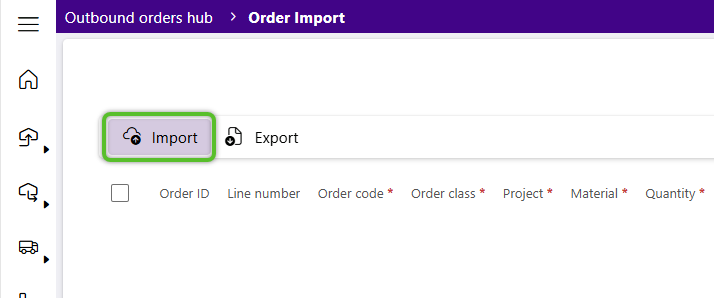
1. From the Outbound Hub, click the option to Import Orders.
2. Click the Export option at the top of the Inbound Order Import page to download the template.
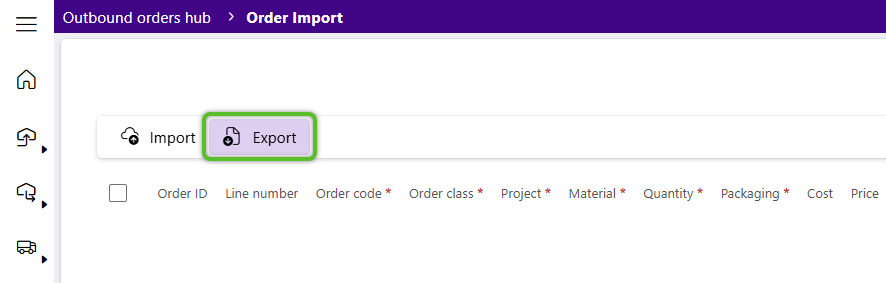
3. Locate the file named 'ExcelOrderImport_excel_order_import_gridComponent_export' and double click on it to open it.

Important
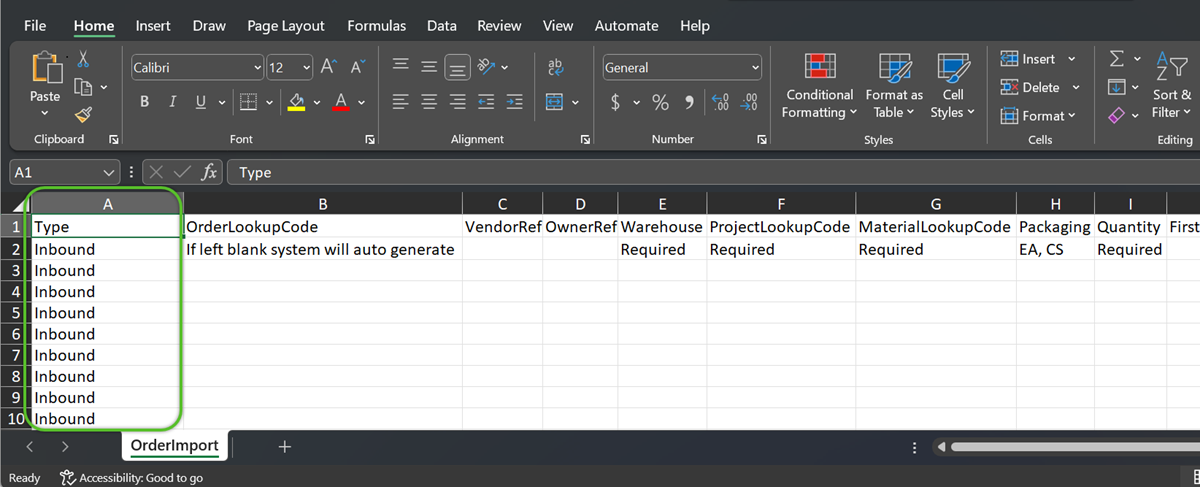
To avoid errors when importing, do not make changes to the name of any column. This will cause the automated import process to fail.
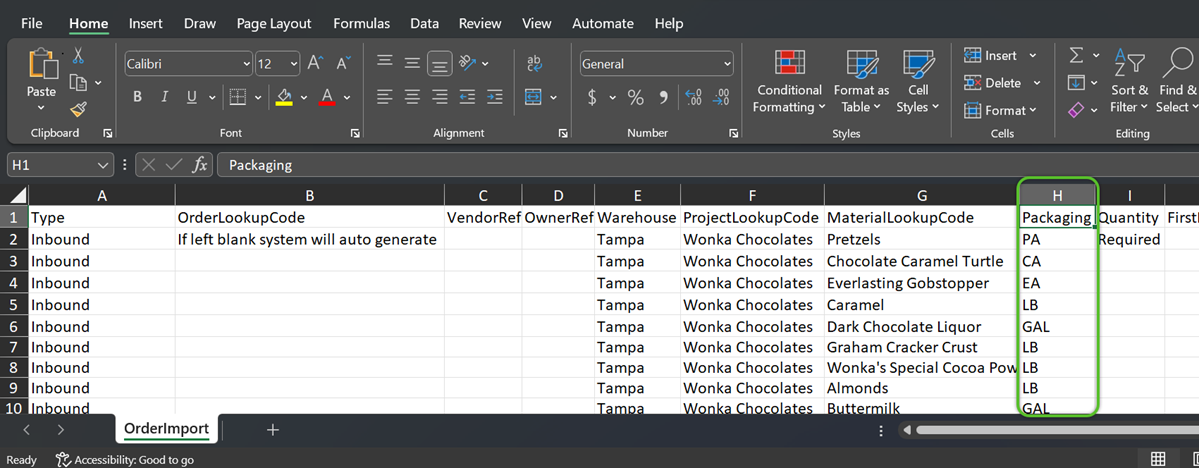
4. In required column A, indicate that the order is Outbound.
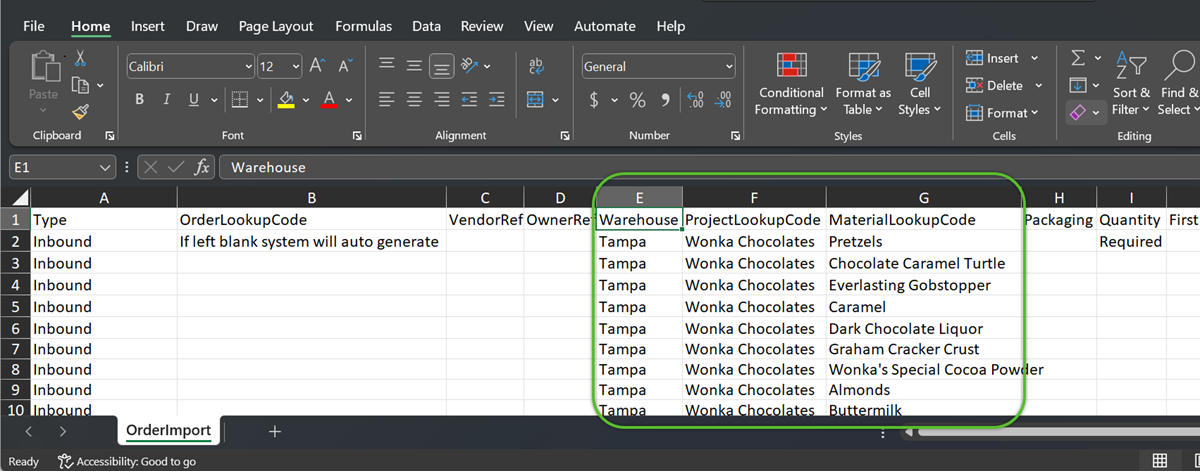
5. In required columns E, F, and G, indicate the Warehouse, ProjectLookupCode, and MaterialLookupCode(s).
Important
When adding data to the import file, all capitalization, spelling, and spacing-- including spaces at the beginning or end that may not be easily seen, must match exactly with the Warehouse, ProjectLookupCode, and MaterialLookupCode fields in Footprintor an error will occur when importing.
6. In required column H, select the specific type of Packaging for each material.
Important
To avoid errors when importing, the Packaging data added in column H of the import file must be an available packaging type in Footprint for the material (MaterialLookupCode) listed in column G.
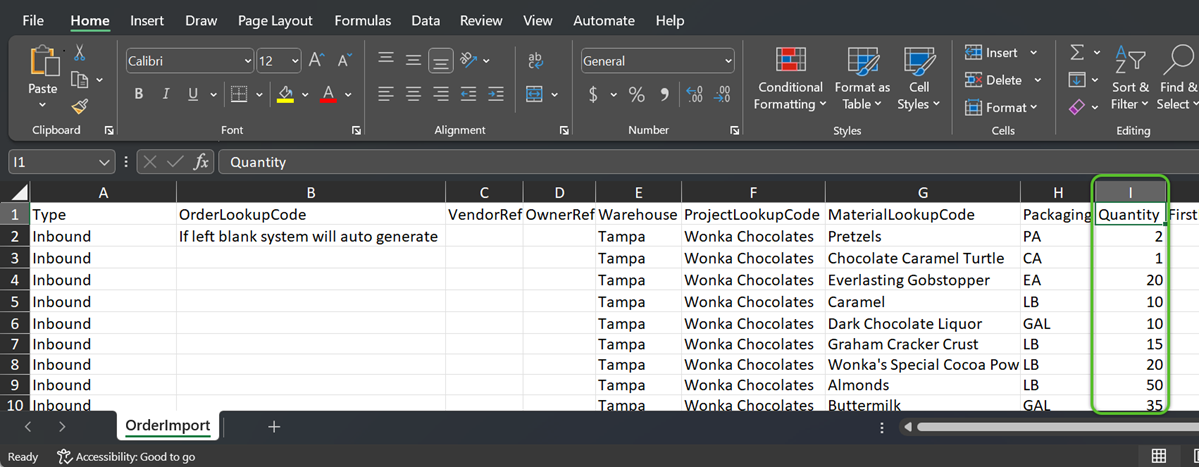
7. In required column I, enter the Quantity of each material listed.
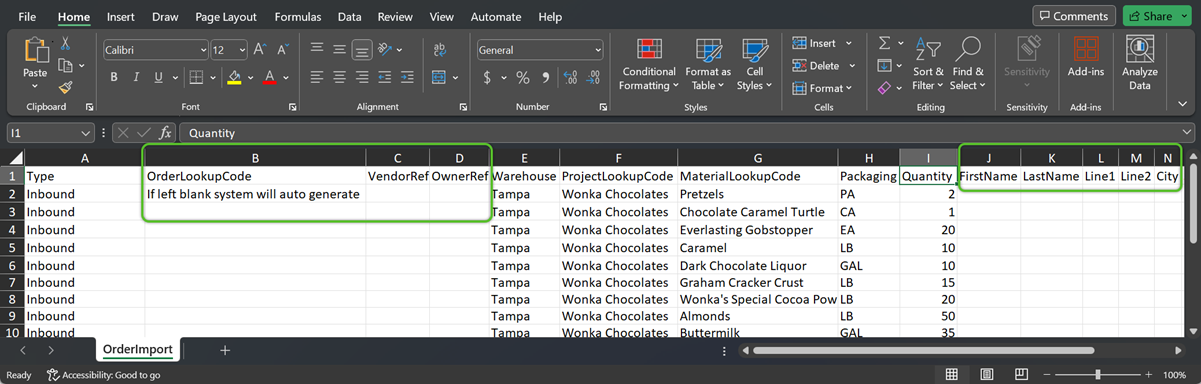
8. When possible, enter the optional details for each order, keeping mind that the Import process is not intended for future data updates.
9. Save and close the spreadsheet, then click Import in the toolbar to select the file for upload.
The order details will display for review and edits.
Click into a row to make changes to an order, then click the checkmark on the right to update the order details.

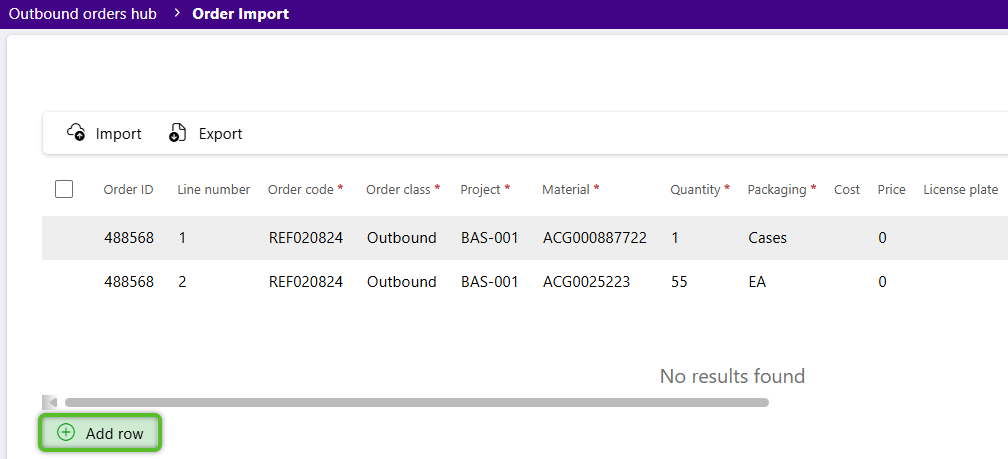
10. To add rows, click the + Add Row button at the bottom of the order list.
The newly imported outbound orders will display alongside other orders in the Outbound Hub.
| Last Updated: |
| 08/12/2025 |
Copyright © 2026 Datex Corporation