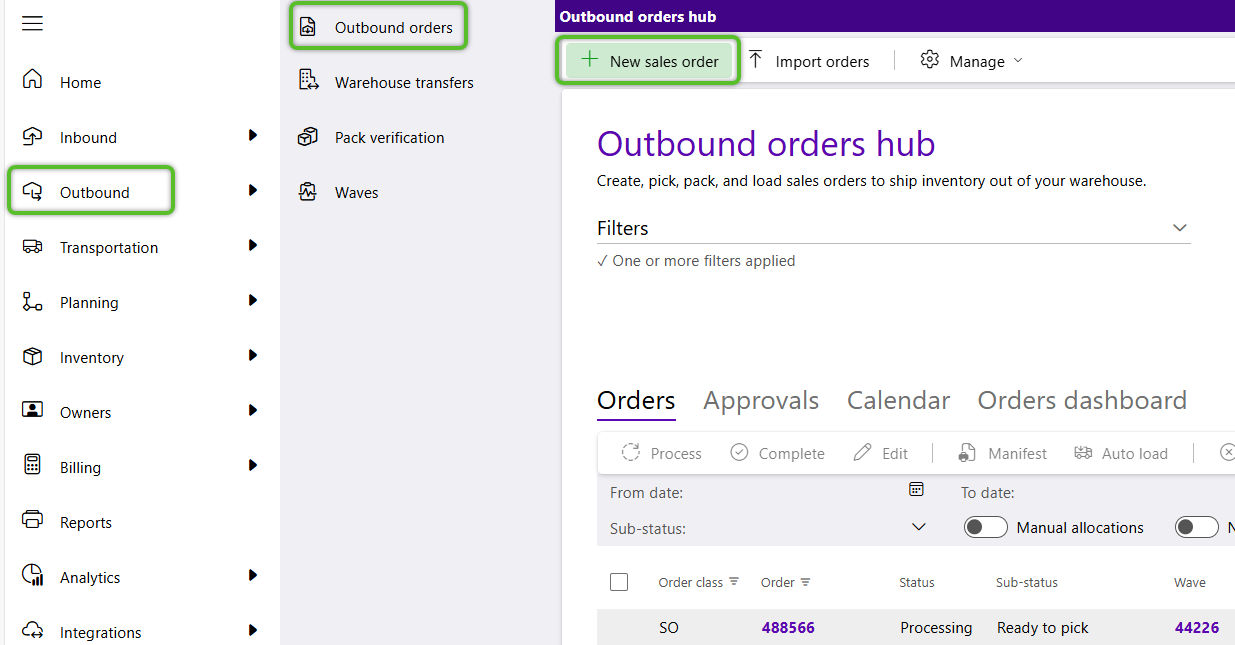
Create an Outbound Order
Outbound Orders identify the specific inventory to be moved out of the warehouse. All Outbound Order Class Types share the same goal: to identify inventory to be shipped or moved out of the warehouse. Once created, the Order can be managed from the Outbound Hub. Outbound Orders can also be imported or copied.
1. From the Outbound Hub, click the option to + Create Sales Order.
Tip
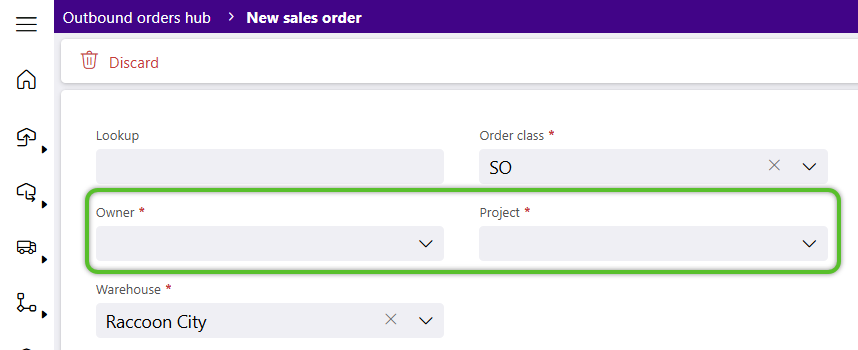
Values already selected in the Outbound Hub Filters, such as Owner, Project, or Warehouse will auto-populate. Otherwise, the Warehouse field populates based on the user's Default Warehouse.
The Lookup will populate an Order number upon creation, unless otherwise specified, and the Order Class defaults to SO.
2. Select the required Owner of the Materials that will be leaving.
3. Select the required Project for the Materials and tab out of the field to create the new Outbound Order.
4. To enter optional information about the vendor to whom you are sending the order, click to open the Details dropdown.
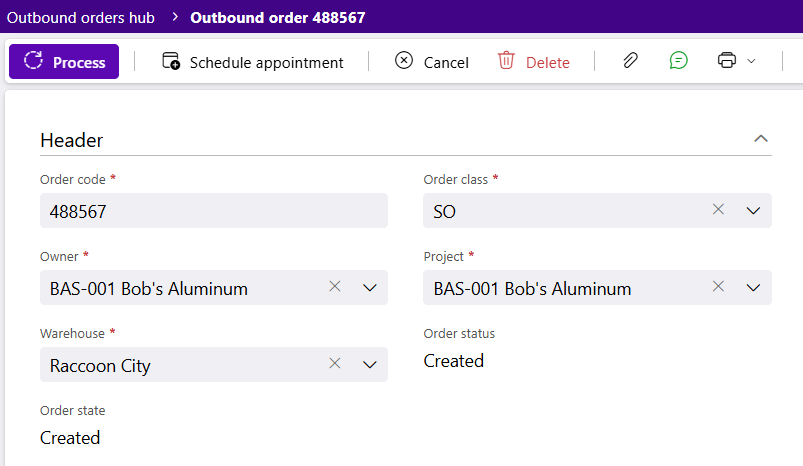
| Order: | The ID number for the Order. |
| Order Class: | The Order Class the Order has been assigned to. |
| Owner: | The Name of the Owner for whom the Order was created. |
| Project: | The Name of the Project associated with the Order. |
| Warehouse: | The Warehouse where the Order was Created. |
| Order Status: | The current Status of the Order. |
| Order State: | The current State of the Order. |
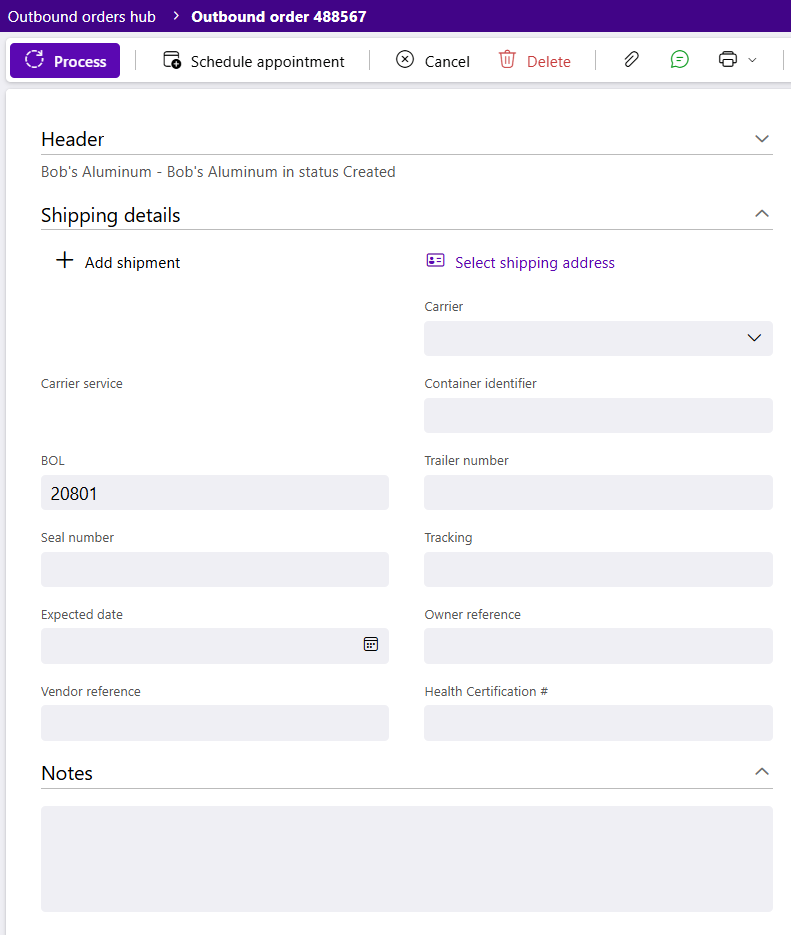
| Ship To: | The Ship To Address for the Outbound Order. |
| Vendor Reference: | The Reference Number given to the Vendor for the Vendor's Reference. |
| Expected Date: | The Date the Delivery is Expected by, if specified in the Order's creation. |
| Carrier: | The Carrier specified for the Order. |
| Service: | The Service specified for the Order. |
| Owner Reference: | The Reference Number given to the Order for the Owner's Reference. |
| Container Identifier: | The Container ID specified for the Order. |
| BOL: | The Bill of Lading for the Order. |
| Trailer Number: | The Trailer Number for the Order. |
| Seal Number: | The Seal Number for the Order. |
| Tracking: | The Tracking ID specified for the Order. |
| Pickup Date: | The Pickup date and time specified for the Order. |
| Custom Fields: | Specific to your organization. |
| Notes: | Any Notes for the Order. |
5. Click the + Add Row option at the bottom of the Lines tab to begin specifying the Inventory to Pick.
Specific Lots, License Plates, or Serials can be added using the + Add Lines by Inventory option.
6. Select a Material from the list available to the Project.
7. Select the correct Packaging and enter the required Quantity.
Note
If a Lot is not selected for a Line, the default is the Material 's Allocation Strategy.
8. Click the green checkmark at the end of the row.
Repeat steps 5-8 to add more order Lines.

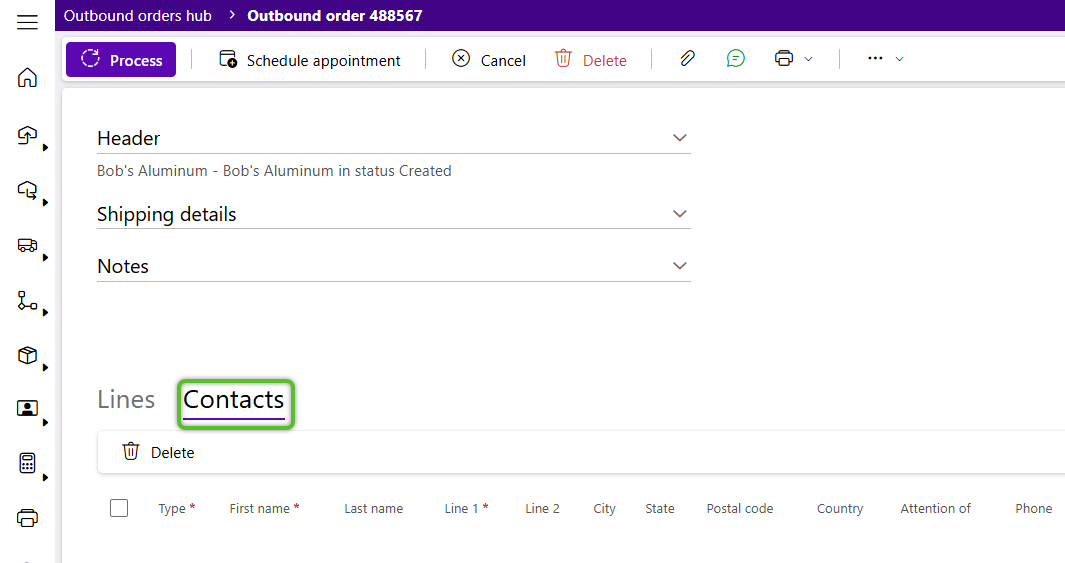
9. Click the Contacts tab to add contacts.
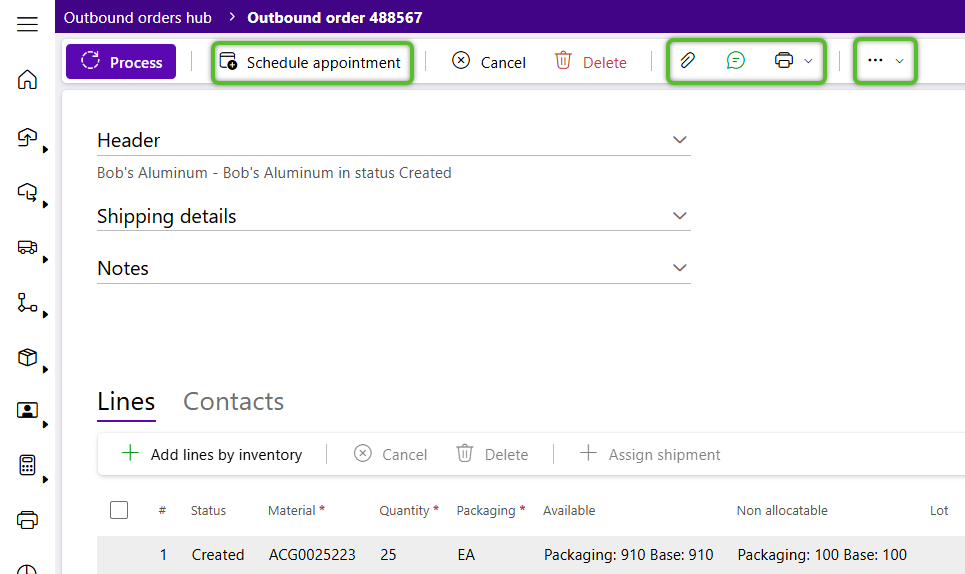
10. Use the Order Toolbar options to Add a Dock Appointment, Add Attachments, Add Comments, Copy the Order, and so on.
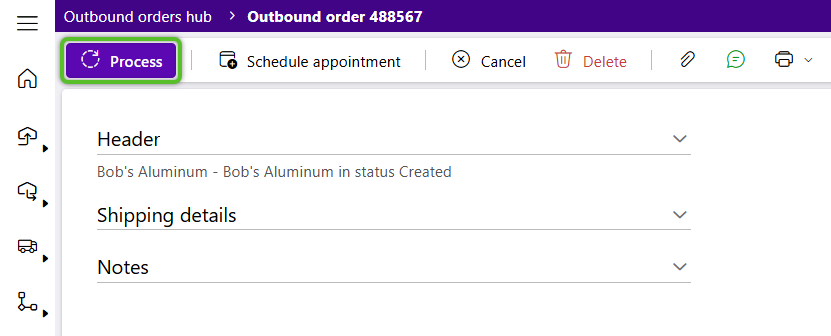
11. Finally, when Picking for the order may begin, click the Process option in the Order Toolbar.
Note
To Process and Outbound Order, a Default Picking Location must be set.
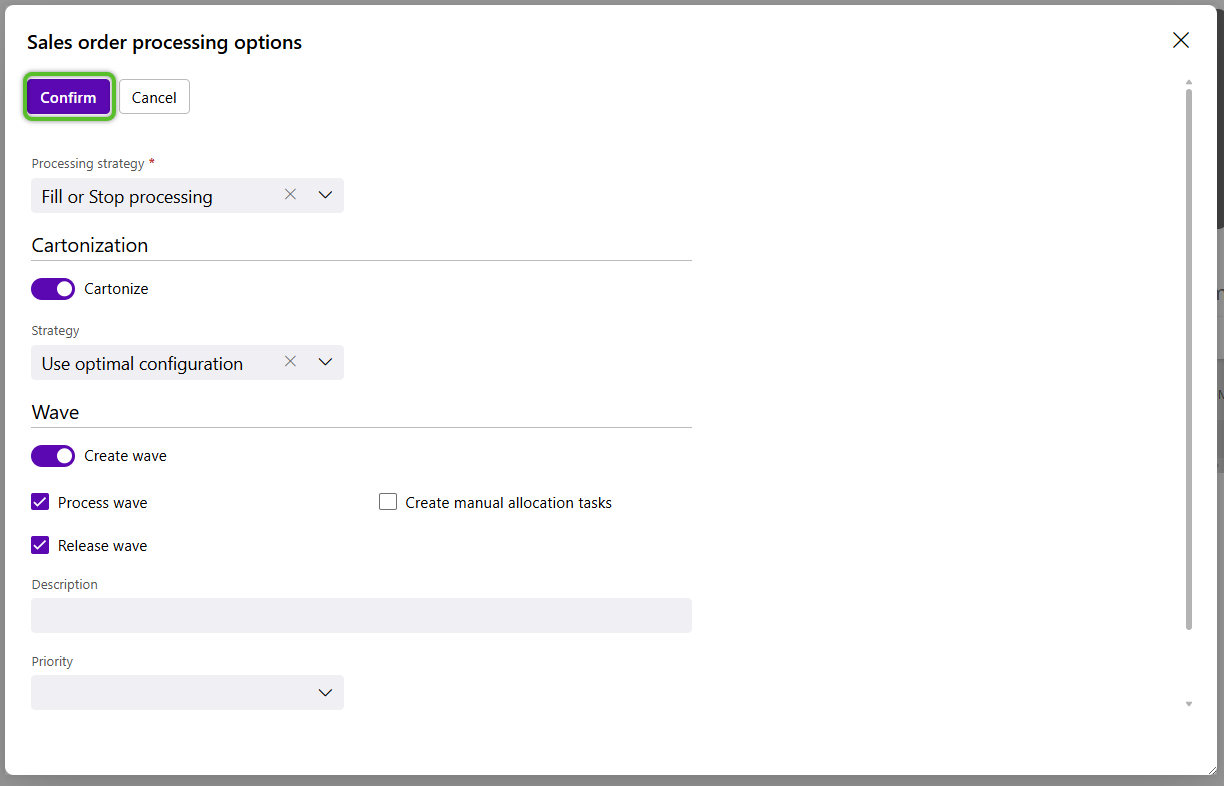
12. Set the details in the Order Processing Options window, then click the Confirm button.
Now that you've created and processed the new Outbound Order, Picking can begin and the order can be managed as needed from the Outbound Hub.
| Last Updated: |
| 08/12/2025 |
Copyright © 2026 Datex Corporation