Sections
Related Tutorials
- Setting Up Warehouses
- Setting Up Replenishments
- Adding Inventory to a Location
- Adjusting Inventory in a Location
Overview
Accessed through the Warehouse Setup section, the View Menu, or by pressing Alt+W, the Warehouse Explorer is where you organize your Warehouse, creating and editing Locations. You can also get a broad view of what Inventory is stored in each Location.
More advanced Location Rules are set here as well, including Replenishment, Temperature Category Rules, Mixing Restrictions, Picking Packing and Putaway Sequences, and so on.
Tip
The View Menu and pressing Alt+W display the Default Warehouse. To set this, go to the Options Menu, and select the Warehouse you'd like under the Default Warehouse sub-menu.
From here you can...
Main Screen Layout
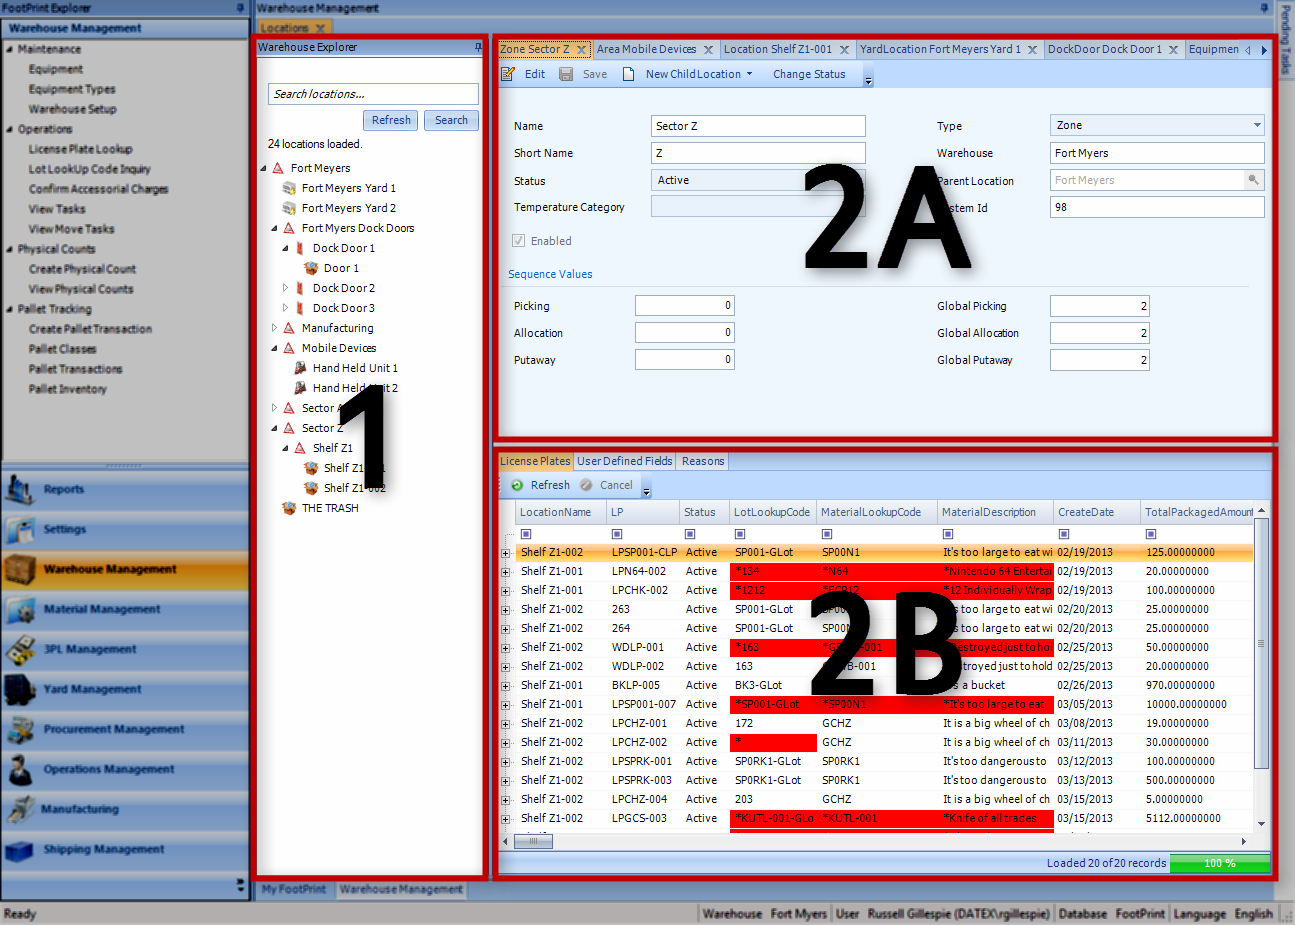
The Warehouse Explorer section is divided into two main parts: the Warehouse Explorer, and the Location Editor.
1. The Warehouse Explorer
The Warehouse Explorer is a listing of all the Locations in your Warehouse. Each Zone or Area can be expanded to view its Child Locations. The top of the Explorer features a Search field, with which you can search for specific Locations. Locations can be opened from here as well.
2. Location Editor
The second half of the section is the Location Editor, displaying new or opened Locations, each in their own tab. The Location Editor is further divided into two sections:
2A. Location Details
This is where you edit the details of Locations.
2B. Location Information
Here you can view information on the Locations about their Inventory and more.
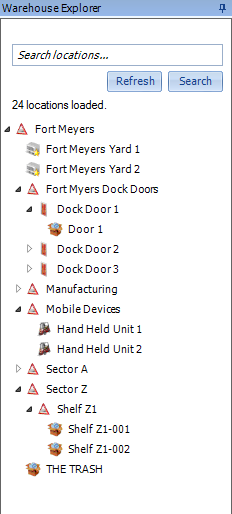
The Warehouse Explorer
|
The Warehouse Explorer displays all Locations created for your Warehouse. Each Location is grouped by the Zone or Area they are created under, and can be accessed by clicking the arrow icon ( Double-clicking an Area, Zone, or Location will open it in a new tab in the Location Editor section. Right-clicking a Location allows you to Add Inventory to that Location, opening a pop-up window (see the Adding Inventory to a Location tutorial for more information). Right-clicking an Area or Zone allows you to create a new Child Location. Under the Add Child Container sub-menu, you can choose to add Inventory (a standard Location), Equipment (a special type of Location to associate with a Mobile Device), a Zone or Area, a Dock Door (for Receiving and Loading), and a Yard Location. By entering a term in the Search field and clicking Search, the Explorer will display only Locations that match the search terms entered. Clicking Refresh will reset the Explorer to show all Locations. |
|
 ). Clicking the arrow icon again will collapse the section.
Tip
Equating your operation to a computer, the Warehouse could be thought of as a hard drive that contains within in it many folders (Zones and Areas) and files (Locations).
Location Editor
The Location Editor is where all Location information is displayed when a Location is opened by double-clicking it in the Warehouse Explorer. The information displayed, however, is different for each type of Location.
Areas and Zones
Areas and Zones are sections of your Warehouse. They can represent rooms, aisles, shelves, or whatever you want to configure them to represent. They cannot, however, hold Inventory. Areas and Zones instead can contain Locations, which, in turn, hold the Inventory.
The only difference between Zones and Areas is that Zones can be assigned Temperature Categories and be Enabled or Disabled, while Areas cannot. They still serve the same function in the system, though.
Tip
Think of Areas and Zones as folders that contain files (Locations).
The Edit and Save buttons allow you to edit and save the Area or Zone you are working on. The New Child Location button lets you create a Location, Equipment Location, Dock Door, Zone, or Yard Location within the Area or Zone you have open. You can also change the Status of the Area or Zone with the Change Status button.

| Name: | The Name of the Area or Zone. This functions as a LookUp Code for the Area or Zone. |
| Short Name: | A Short Name for the Area or Zone. |
| Status: | A system-generated field displaying the Status of the Area or Zone. |
| Temperature Category:† | A drop-down list from which you can select a Temperature Category for the Zone. |
| Type: | A system-generated field displaying the Location Type. |
| Warehouse: | A system-generated field displaying the Warehouse the Area or Zone is in. |
| Parent Location: | The Area or Zone that this Location is in. Click the magnifying glass icon to open a pop-up from which you can select the Parent Location. |
| System ID: | A field displaying the system-generated ID number for the Location. This cannot be changed, and is used only by the system itself. |
The Enabled box does not appear to have an affect on the Zone or its Child Locations.†
*Those in red are required fields.
†Only appear in Zones.

Sequences are determined by the system, based on the values entered in the Picking, Allocation, and Putaway fields. Once these values have been entered for each Location, clicking the Generate Global Sequence buttons in the Warehouse Setup section creates Global Sequences, by which the system determines what order to Pick, Allocate, and Putaway.
| Picking: | The Picking Sequence position you'd like this Location to occupy. |
| Allocation: | The Allocation Sequence position you'd like this Location to occupy. |
| Putaway: | The Putaway Sequence position you'd like this Location to occupy. |
| Global Picking: | A system-generated field displaying the Global Picking Sequence position this Location occupies. |
| Global Allocation: | A system-generated field displaying the Global Allocation Sequence position this Location occupies. |
| Global Putaway: | A system-generated field displaying the Global Putaway Sequence position this Location occupies. |
Composite License Plates will be listed first, and by clicking the + icon to its left, each associated License Plate will be listed below it, displaying the same information.

| Location Name: | The Location of the License Plate. |
| LP: | The License Plate LookUp Code. |
| Status: | The Status of the License Plate. |
| Lot LookUp Code: | The Lot for the Material on the License Plate. |
| Material LookUp Code: | The Material LookUp Code for the Material on the License Plate. |
| Material Description: | A description of the Material on the License Plate. |
| Create Date: | The Date on which the License Plate was created in the system. |
| Total Packaged Amount: | The Total number of the specified Packages on the License Plate. |
| Packaging UOM Name: | The Packaging Type for the Materials on the License Plate. |

| Total Inventory Amount: | The total number of Packages on the License Plate, regardless of Packaging Type. |
| Net Weight: | The License Plate's Weight, without factoring in Containers or Packaging. |
| Gross Weight: | The License Plate's Weight, including Containers and Packaging. |
| Weight UOM: | The Unit by which the Weight is Measured. |
| Contents Owner Count: | The number of unique Owners who have Inventory on this License Plate. |
| Contents Project Count: | The number of unique Projects with Inventory on this License Plate. |
| Shipment LookUp Code: | If the License Plate is associated with a Shipment, its LookUp Code is displayed here. |
| Material Name: | The Name of the Material on the License Plate. |
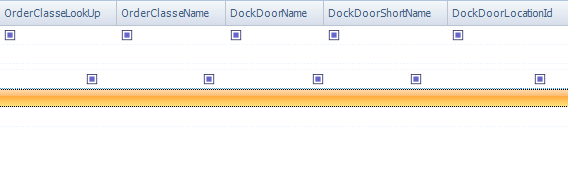
| Order Class LookUp: | The system-generated LookUp Code for the Order Class of the Order the License Plate is associated with, if any. |
| Order Class Name: | The Name of the Order Class for the Order the License Plate is associated with, if any. |
| Dock Door Name: | The Dock Door at which the License Plate is assigned to. |
| Dock Door Short Name: | The Short Name for the Dock Door the License Plate is assigned to. |
| Dock Door Location ID: | The System ID for the Dock Door the License Plate is assigned to. |
By double-clicking a License Plate, you can open it in a new tab.
By clicking the + icon next to a License Plate, you can view the Inventory on it.

| LP: | The LookUp Code for the License Plate the Material is on. |
| Lot LookUp Code: | The Lot for the Material on the License Plate. |
| Material LookUp Code: | The Material LookUp Code for the Material on the License Plate. |
| Material Description: | A description of the Material on the License Plate. |
| Packaged Amount: | The number of Packages of the Material on the License Plate. |
| Packaging Name: | The Packaging Type for the Materials on the License Plate. |
| Base Amount: | The Amount of units of the Base Packaging Type for the Material on the License Plate. |

| Base Packaging: | The Base Packaging Type for the Material on the License Plate. |
| Material Name: | The Name of the Material on the License Plate. |
| Project Name: | The Name of the Project under which the Material is classified. |
| Expiration Date: | The Date on which the Material on the License Plate Expires. |
| Vendor Lot LookUp Code: | The Vendor Lot for the Material on the License Plate. |
| Vendor Lot Vat: | If a Vat was used in the production of the Material, this is the Vat LookUp Code. |

| License Plate Content Expiration Date: | The Date on which the License Plate's Contents Expire. |
| Lot Notes: | Any Notes in the system for the Lot. |
| Vendor Lot Expiration Date: | The Date on which the Material's Vendor Lot Expires. |
| Lot Description: | A description of the Lot of the Material on the License Plate. |
| Vendor Lot Notes: | Any Notes in the system for the Vendor Lot. |
| Warehouse Name: | The Name of the Warehouse in which the License Plate is Located. |
| Vendor Lot Description: | A description of the Vendor Lot of the Material on the License Plate. |
By double-clicking an Inventory entry, you are able to adjust its Quantity, add or change its Container Type, add a Reason Code for the change, and add Notes to it.
Any fields you have set up for this section will appear here. For more information, see the User Defined Fields section.
The Reasons tab contains the Reason Codes currently applicable to the item, and the Reason History displaying all Reasons assigned to it.
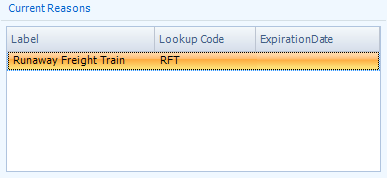
| Label: | Reason Code Name. |
| LookUp Code: | The LookUp Code for the Reason Code. |
| Expiration Date: | The items new Expiration Date. |
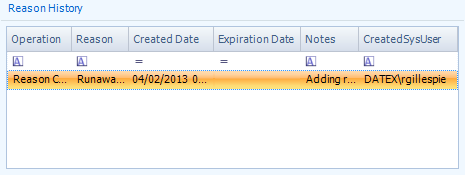
| Operation: | The Operation Code for the Reason. |
| LookUp Code: | The LookUp Code for the Reason Code. |
| Created Date: | The Date on which the Reason Code was added to the item. |
| Expiration Date: | The items new Expiration Date. |
| Notes: | Any Notes in the system attached to the Reason Code for this item. |
| Created Sys User: | The Footprint User who added the Reason Code to the item. |
Locations
The Locations are the subsection of your Warehouse that are actually capable to holding Inventory. It is this level that can have License Plates and Materials assigned to it. They can exist on the base level of the Warehouse, but are more commonly contained within Areas or Zones.
Tip
If you think of Locations as files in a computer, you can think of the information in those files as the Materials kept within the Locations.
The Edit and Save buttons allow you to edit and save the Location you are working on. You can also change the Status of the Location with the Change Status button.
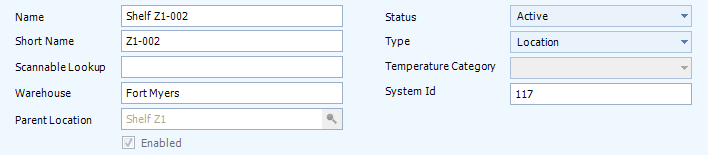
| Name: | The Name of the Location. This functions as a LookUp Code for the Location. |
| Short Name: | A Short Name for the Location. |
| Scannable LookUp: | A LookUp Code that can be scanned by Mobile Devices for quick reference to the Location. |
| Warehouse: | A system-generated field displaying the Warehouse the Location is in. |
| Parent Location: | The Area or Zone that this Location is in. Click the magnifying glass icon to open a pop-up from which you can select the Parent Location. |
| Status: | A system-generated field displaying the Status of the Location. |
| Type: | A system-generated field displaying the Location Type. |
| Temperature Category: | A drop-down list from which you can select a Temperature Category for the Location. |
| System ID: | A field displaying the system-generated ID number for the Location. This cannot be changed, and is used only by the system itself. |
Putting a check mark in the Enabled box allows the Location to be used to store Inventory.
*Those in red are required fields.
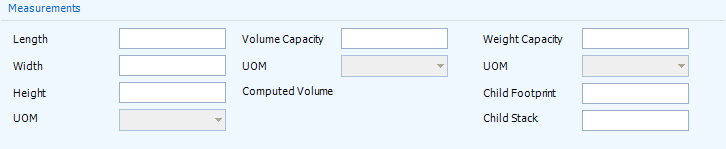
The Measurements outline physical dimensions for the Location, as well as Weight Capacity and rules for arranging License Plates.
| Length: | Length of the Location. |
| Height: | Height of the Location. |
| Width: | Width of the Location. |
| UOM: | Unit of measurement for distance. Options include meter, centimeter, foot, and inch. |
| Volume Capacity: | Cubic space that the Location can safely contain. |
| UOM: | Unit of measurement for volume. Options include cubic meter, cubic centimeter, cubic foot, and cubic inch. |
| Weight Capacity: | The top Weight that the Location can safely hold. |
| UOM: | Unit of measurement for weight. Options include kilogram, gram, pound, ounce, ton, troy ounce, and metric ton. |
| Child Footprint : | The number of License Plates (typically Pallets) that can safely be stored on the bottom of this Location. |
| Child Stack: | The number of License Plates that can safely be stacked atop each other in this Location. |
The Computer Volume displays the system's projection of the are Location's Volume Capacity based on the given Length, Width, and Height.
Sequences are determined by the system, based on the values entered in the Picking, Allocation, and Putaway fields. Once these values have been entered for each Location, clicking the Generate Global Sequence buttons in the Warehouse Setup section creates Global Sequences, by which the system determines what order to Pick, Allocate, and Putaway.
| Picking: | The Picking Sequence position you'd like this Location to occupy. |
| Allocation: | The Allocation Sequence position you'd like this Location to occupy. |
| Putaway: | The Putaway Sequence position you'd like this Location to occupy. |
| Global Picking: | A system-generated field displaying the Global Picking Sequence position this Location occupies. |
| Global Allocation: | A system-generated field displaying the Global Allocation Sequence position this Location occupies. |
| Global Putaway: | A system-generated field displaying the Global Putaway Sequence position this Location occupies. |
Composite License Plates will be listed first, and by clicking the + icon to its left, each associated License Plate will be listed below it, displaying the same information.
| Location Name: | The Location of the License Plate. |
| LP: | The License Plate LookUp Code. |
| Status: | The Status of the License Plate. |
| Lot LookUp Code: | The Lot for the Material on the License Plate. |
| Material LookUp Code: | The Material LookUp Code for the Material on the License Plate. |
| Material Description: | A description of the Material on the License Plate. |
| Create Date: | The Date on which the License Plate was created in the system. |
| Total Packaged Amount: | The Total number of the specified Packages on the License Plate. |
| Packaging UOM Name: | The Packaging Type for the Materials on the License Plate. |
| Total Inventory Amount: | The total number of Packages on the License Plate, regardless of Packaging Type. |
| Net Weight: | The License Plate's Weight, without factoring in Containers or Packaging. |
| Gross Weight: | The License Plate's Weight, including Containers and Packaging. |
| Weight UOM: | The Unit by which the Weight is Measured. |
| Contents Owner Count: | The number of unique Owners who have Inventory on this License Plate. |
| Contents Project Count: | The number of unique Projects with Inventory on this License Plate. |
| Shipment LookUp Code: | If the License Plate is associated with a Shipment, its LookUp Code is displayed here. |
| Material Name: | The Name of the Material on the License Plate. |
| Order Class LookUp: | The system-generated LookUp Code for the Order Class of the Order the License Plate is associated with, if any. |
| Order Class Name: | The Name of the Order Class for the Order the License Plate is associated with, if any. |
| Dock Door Name: | The Dock Door at which the License Plate is assigned to. |
| Dock Door Short Name: | The Short Name for the Dock Door the License Plate is assigned to. |
| Dock Door Location ID: | The System ID for the Dock Door the License Plate is assigned to. |
By double-clicking a License Plate, you can open it in a new tab.
By clicking the + icon next to a License Plate, you can view the Inventory on it.
| LP: | The LookUp Code for the License Plate the Material is on. |
| Lot LookUp Code: | The Lot for the Material on the License Plate. |
| Material LookUp Code: | The Material LookUp Code for the Material on the License Plate. |
| Material Description: | A description of the Material on the License Plate. |
| Packaged Amount: | The number of Packages of the Material on the License Plate. |
| Packaging Name: | The Packaging Type for the Materials on the License Plate. |
| Base Amount: | The Amount of units of the Base Packaging Type for the Material on the License Plate. |
| Base Packaging: | The Base Packaging Type for the Material on the License Plate. |
| Material Name: | The Name of the Material on the License Plate. |
| Project Name: | The Name of the Project under which the Material is classified. |
| Expiration Date: | The Date on which the Material on the License Plate Expires. |
| Vendor Lot LookUp Code: | The Vendor Lot for the Material on the License Plate. |
| Vendor Lot Vat: | If a Vat was used in the production of the Material, this is the Vat LookUp Code. |
| License Plate Content Expiration Date: | The Date on which the License Plate's Contents Expire. |
| Lot Notes: | Any Notes in the system for the Lot. |
| Vendor Lot Expiration Date: | The Date on which the Material's Vendor Lot Expires. |
| Lot Description: | A description of the Lot of the Material on the License Plate. |
| Vendor Lot Notes: | Any Notes in the system for the Vendor Lot. |
| Warehouse Name: | The Name of the Warehouse in which the License Plate is Located. |
| Vendor Lot Description: | A description of the Vendor Lot of the Material on the License Plate. |
By double-clicking an Inventory entry, you are able to adjust its Quantity, add or change its Container Type, add a Reason Code for the change, and add Notes to it.
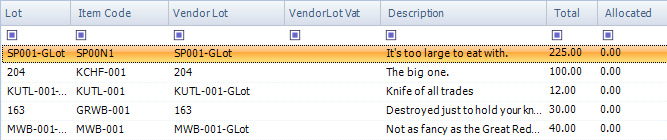
The Show By Lot box changes the displayed information, grouping by Lot.

| Item Code: | The Material LookUp Code for the Material. |
| Description: | A description of the Material. |
| Total: | The total amount of the Material in each Warehouse listed. |
| Allocated: | The amount of the Material which is reserved for Order(s) in the system. |
| Incoming Packaged Amount: | The amount of Materials that are assigned to be stored in this Location. |
| Available: | The total amount of the Material available for use in Orders. |
| Active: | The amount of the Material that is in the Active Status. |
| Inactive: | Amount of Material stored, but not in the Active Status. |
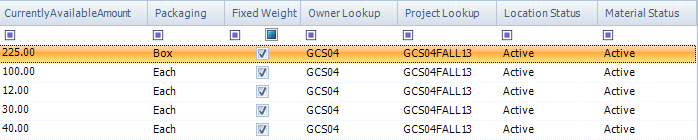
| Currently Available Amount: | The amount of the Material that has not been Allocated and is available for use in Orders. |
| Packaging: | The Packaging level of this Material. |
| Fixed Weight: | This box is checked if the Material is a Fixed Weight. |
| Owner LookUp: | The LookUp Code for the Owner of the Material. |
| Project LookUp: | The LookUp Code for the Project the Material is part of. |
| Location Status: | The status of the Location. |
| Material Status: | The status of the Material. |
| Lot: | The LookUp code for the Lot the Material is part of. |
| Item Code: | The Material LookUp Code for the Material. |
| Vendor Lot: | The Vendor Lot the Material belongs to. |
| Vendor Lot VAT: | The Value Added Tax identification number for the Vendor Lot. |
| Description: | A description of the Material. |
| Total: | The total amount of the Material in each Warehouse listed. |
| Allocated: | The amount of the Material which is reserved for Order(s) in the system. |

| Incoming Packaged Amount: | The amount of Materials that are assigned to be stored in this Location. |
| Available: | The total amount of the Material available for use in Orders. |
| Active: | The amount of the Material that is in the Active Status. |
| Inactive: | Amount of Material stored, but not in the Active Status. |
| Currently Available Amount: | The amount of the Material that has not been Allocated and is available for use in Orders. |
| Packaging: | The Packaging level of this Material. |
| Fixed Weight: | This box is checked if the Material is a Fixed Weight. |
| Owner LookUp: | The LookUp Code for the Owner of the Material. |

| Project LookUp: | The LookUp Code for the Project the Material is part of. |
| Location Status: | The Status of the Location. |
| Material Status: | The Status of the Material. |
| Lot Status: | The Status of the Lot. |
| Lot Expiration Date: | The date on which the Lot Expires. |
| Lot Manufacture Date: | The date on which the Lot was manufactured. |
| Lot Create Date: | The date on which the Lot was created. |
Only Footprint Users with a check mark in the Allow box next to their User Name will be able to work with this area.
Note
By default, Users have no check in either Allow or Deny, effectively denying them access.
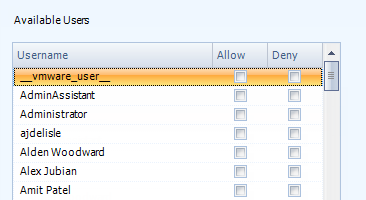
| Username: | The Footprint User's username. |
| Allow: | Put a check mark in this box by clicking it to give the User access to this area. |
| Deny: | Put a check mark in this box by clicking it to prevent the User from accessing this area. |
You can select specific Equipment Types to prevent them from being used in this Location.
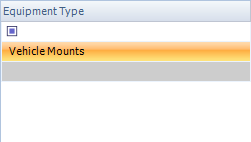
Click the grey line, then select the Equipment Type from the drop-down list.
When setting up a Location with Assigned Materials, only those Materials will be allowed in the Location. Attempting to move unassigned Materials into a Location that has any assigned Materials will not work, and the user will see a pop-up message explaining why.
Locations with no Assigned Materials are able to store any Materials.
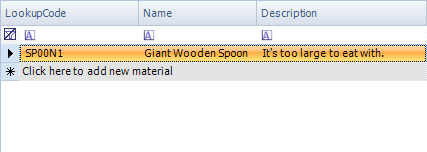
Click the grey line, and click the magnifying glass icon  under the LookUp Code column to open a pop-up window, in which you can select the Material.
Any tags you have set up for this item will appear here. Just put a check mark by any Tag you'd like associated with the item. Tags are typically used for Reporting purposes, but can be used by certain operations as well. For more information, see the Tags section.
Any fields you have set up for this section will appear here. For more information, see the User Defined Fields section.
The Reasons tab contains the Reason Codes currently applicable to the item, and the Reason History displaying all Reasons assigned to it.
| Label: | Reason Code Name. |
| LookUp Code: | The LookUp Code for the Reason Code. |
| Expiration Date: | The items new Expiration Date. |
| Operation: | The Operation Code for the Reason. |
| LookUp Code: | The LookUp Code for the Reason Code. |
| Created Date: | The Date on which the Reason Code was added to the item. |
| Expiration Date: | The items new Expiration Date. |
| Notes: | Any Notes in the system attached to the Reason Code for this item. |
| Created Sys User: | The Footprint User who added the Reason Code to the item. |
Here you can set any Materials that will be use this Location as a Primary Pick Location.
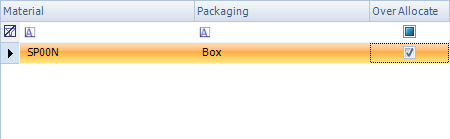
| Material: | The Material to set for Primary Picking at this Location. |
| Packaging: | The Packaging Type that you would like to set to Primarily Pick from this Location. |
| Over Allocate: | A check mark in this box allows this Material to be Over Allocated from this Location. |
*Those in red are required fields.
Yard Locations
A Yard Location is designed to simulate, as you might imagine, your warehouse yard. It can hold Materials like a normal Location, but is not really intended to be a permanent storage location.
The Edit and Save buttons allow you to edit and save the Yard Location you are working on. You can also change the Status of the Yard Location with the Change Status button.

| Name: | The Name of the Yard Location. This functions as a LookUp Code for the Yard Location. |
| Short Name: | A Short Name for the Yard Location. |
| Status: | A system-generated field displaying the Status of the Yard Location. |
| Type: | A system-generated field displaying the Location Type. |
| Warehouse: | A system-generated field displaying the Warehouse the Yard Location is at. |
| Parent Location: | The Area or Zone that this Location is in. Click the magnifying glass icon to open a pop-up from which you can select the Parent Location. |
| System ID: | A field displaying the system-generated ID number for the Location. This cannot be changed, and is used only by the system itself. |
*Those in red are required fields.
Sequences are determined by the system, based on the values entered in the Picking, Allocation, and Putaway fields. Once these values have been entered for each Location, clicking the Generate Global Sequence buttons in the Warehouse Setup section creates Global Sequences, by which the system determines what order to Pick, Allocate, and Putaway.
| Picking: | The Picking Sequence position you'd like this Location to occupy. |
| Allocation: | The Allocation Sequence position you'd like this Location to occupy. |
| Putaway: | The Putaway Sequence position you'd like this Location to occupy. |
| Global Picking: | A system-generated field displaying the Global Picking Sequence position this Location occupies. |
| Global Allocation: | A system-generated field displaying the Global Allocation Sequence position this Location occupies. |
| Global Putaway: | A system-generated field displaying the Global Putaway Sequence position this Location occupies. |
Composite License Plates will be listed first, and by clicking the + icon to its left, each associated License Plate will be listed below it, displaying the same information.
| Location Name: | The Location of the License Plate. |
| LP: | The License Plate LookUp Code. |
| Status: | The Status of the License Plate. |
| Lot LookUp Code: | The Lot for the Material on the License Plate. |
| Material LookUp Code: | The Material LookUp Code for the Material on the License Plate. |
| Material Description: | A description of the Material on the License Plate. |
| Create Date: | The Date on which the License Plate was created in the system. |
| Total Packaged Amount: | The Total number of the specified Packages on the License Plate. |
| Packaging UOM Name: | The Packaging Type for the Materials on the License Plate. |
| Total Inventory Amount: | The total number of Packages on the License Plate, regardless of Packaging Type. |
| Net Weight: | The License Plate's Weight, without factoring in Containers or Packaging. |
| Gross Weight: | The License Plate's Weight, including Containers and Packaging. |
| Weight UOM: | The Unit by which the Weight is Measured. |
| Contents Owner Count: | The number of unique Owners who have Inventory on this License Plate. |
| Contents Project Count: | The number of unique Projects with Inventory on this License Plate. |
| Shipment LookUp Code: | If the License Plate is associated with a Shipment, its LookUp Code is displayed here. |
| Material Name: | The Name of the Material on the License Plate. |
| Order Class LookUp: | The system-generated LookUp Code for the Order Class of the Order the License Plate is associated with, if any. |
| Order Class Name: | The Name of the Order Class for the Order the License Plate is associated with, if any. |
| Dock Door Name: | The Dock Door at which the License Plate is assigned to. |
| Dock Door Short Name: | The Short Name for the Dock Door the License Plate is assigned to. |
| Dock Door Location ID: | The System ID for the Dock Door the License Plate is assigned to. |
By double-clicking a License Plate, you can open it in a new tab.
By clicking the + icon next to a License Plate, you can view the Inventory on it.
| LP: | The LookUp Code for the License Plate the Material is on. |
| Lot LookUp Code: | The Lot for the Material on the License Plate. |
| Material LookUp Code: | The Material LookUp Code for the Material on the License Plate. |
| Material Description: | A description of the Material on the License Plate. |
| Packaged Amount: | The number of Packages of the Material on the License Plate. |
| Packaging Name: | The Packaging Type for the Materials on the License Plate. |
| Base Amount: | The Amount of units of the Base Packaging Type for the Material on the License Plate. |
| Base Packaging: | The Base Packaging Type for the Material on the License Plate. |
| Material Name: | The Name of the Material on the License Plate. |
| Project Name: | The Name of the Project under which the Material is classified. |
| Expiration Date: | The Date on which the Material on the License Plate Expires. |
| Vendor Lot LookUp Code: | The Vendor Lot for the Material on the License Plate. |
| Vendor Lot Vat: | If a Vat was used in the production of the Material, this is the Vat LookUp Code. |
| License Plate Content Expiration Date: | The Date on which the License Plate's Contents Expire. |
| Lot Notes: | Any Notes in the system for the Lot. |
| Vendor Lot Expiration Date: | The Date on which the Material's Vendor Lot Expires. |
| Lot Description: | A description of the Lot of the Material on the License Plate. |
| Vendor Lot Notes: | Any Notes in the system for the Vendor Lot. |
| Warehouse Name: | The Name of the Warehouse in which the License Plate is Located. |
| Vendor Lot Description: | A description of the Vendor Lot of the Material on the License Plate. |
By double-clicking an Inventory entry, you are able to adjust its Quantity, add or change its Container Type, add a Reason Code for the change, and add Notes to it.
Any fields you have set up for this section will appear here. For more information, see the User Defined Fields section.
The Reasons tab contains the Reason Codes currently applicable to the item, and the Reason History displaying all Reasons assigned to it.
| Label: | Reason Code Name. |
| LookUp Code: | The LookUp Code for the Reason Code. |
| Expiration Date: | The items new Expiration Date. |
| Operation: | The Operation Code for the Reason. |
| LookUp Code: | The LookUp Code for the Reason Code. |
| Created Date: | The Date on which the Reason Code was added to the item. |
| Expiration Date: | The items new Expiration Date. |
| Notes: | Any Notes in the system attached to the Reason Code for this item. |
| Created Sys User: | The Footprint User who added the Reason Code to the item. |
Dock Doors
Dock Doors function as another type of Zone or Area, and are designed to represent the loading docks in your warehouse. They cannot hold Materials, but they can hold Locations which can hold Materials. Again, those Locations are not intended as permanent storage locations, but instead as places to Receive and Pick Materials into for Shipments both in and out.
The special function of the Dock Doors is that you are able to schedule Dock Appointments to them, so that you can keep track of when you will be sending or receiving Shipments in and out of your warehouse, and avoid trucks arriving the same time and place. For more information, check out the Dock Appointments tutorial.
The Edit and Save buttons allow you to edit and save the Dock Door you are working on. The New Child Location button lets you create an Inventory Location within the Dock Door you have open.

| Name: | The Name of the Dock Door. This functions as a LookUp Code for the Dock Door. |
| Short Name: | A Short Name for the Dock Door. |
| ID: | A field displaying the system-generated ID number for the Location. This cannot be changed, and is used only by the system itself. |
| Parent: | The Area or Zone that this Location is in. Click the magnifying glass icon to open a pop-up from which you can select the Parent Location. |
| Warehouse: | A system-generated field displaying the Warehouse the Dock Door is at. |
| Type: | A system-generated field displaying the Location Type. |
| Status: | A system-generated field displaying the Status of the Dock Door. |
| Pick Sequence #: | The Picking Sequence position you'd like this Location to occupy. |
| Allocation Sequence #: | The Allocation Sequence position you'd like this Location to occupy. |
| Putaway Sequence #: | The Putaway Sequence position you'd like this Location to occupy. |
| Global Pick Sequence #: | A system-generated field displaying the Global Picking Sequence position this Location occupies. |
| Global Allocation Sequence #: | A system-generated field displaying the Global Allocation Sequence position this Location occupies. |
| Global Putaway Sequence #: | A system-generated field displaying the Global Putaway Sequence position this Location occupies. |
Sequences are determined by the system, based on the values entered in the Picking, Allocation, and Putaway fields. Once these values have been entered for each Location, clicking the Generate Global Sequence buttons in the Warehouse Setup section creates Global Sequences, by which the system determines what order to Pick, Allocate, and Putaway.
*Those in red are required fields.

| Status: | The Status of the Shipment. |
| Type: | The Shipment Type. |
|
Load Container: |
The Load Container LookUp Code, if one was used. |
| Seq: | The place this Shipment occupies in the order of all Shipments assigned to this Door. |
| Dock Door: | The Dock Door the Shipment is assigned to. |
| Carrier: | The Carrier assigned to the Shipment. |
| Item Count: | The number of Packages of individual Materials in the Shipment. |
| Pallet Count: | The number of Pallets being used in the Shipment. |
| Net Weight: | The Net Weight of the Materials on the Shipment, not including their Packaging. |
| Gross Weight: | The Gross Weight of the Shipment, including Packaging. |
| Weight UOM: | The Unit by which the Shipment's Weight is Measured. |
| Wave: | The LookUp Code of the Wave this Shipment is assigned to. |
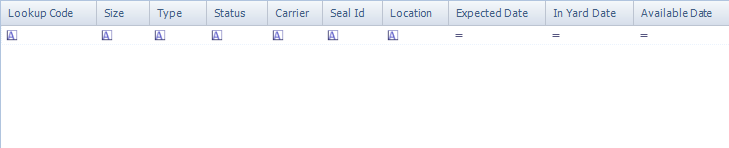
| LookUp Code: | The Load Container's LookUp Code. |
| Size: | The Size of the Load Container. |
| Type: | The Type of Load Container displayed. |
| Status: | The Status of the Load Container. |
| Carrier: | The Carrier who will be delivering the Load Container. |
| Seal ID: | If a Seal is being used for the Load Container, this is that Seal's ID number. |
| Location: | The current Location of the Load Container. |
| Expected Date: | The Date on which the Load Container is Expected. |
| In Yard Date: | The Date on which the Load Container was checked into the Warehouse. |
| Available Date: | The Date on which the Load Container will be made Available. |

| Last Pier Date: | The last day the Container can be on the pier before being charged. |
| Last Onsite Date | The last day the Container can be on your property before being charged. |
| Call Out Date: | The Date on which the Load Container was Called Out for pickup. |
| Door Assignment Date: | The Date on which the Load Container was Assigned a Dock Door. |
| Check Out Date: | The Date on which the Load Container was Checked Out of the Warehouse. |
| Expected Finish Date: | The Date on which the Load Container is expected to be Finished. |
| Expected Yard Location ID: | The LookUp Code of the Yard Location at which the Load Container is expected to be temporarily stored. |
Any fields you have set up for this section will appear here. For more information, see the User Defined Fields section.
Equipment Locations
Before you're able to use Mobile Devices in your warehouse, you have to set them up here first, in your virtual Warehouse. Equipment Locations function similarly to Locations, in that you can store Inventory in them, representing the transitional period when moving Materials from one Location to another.
You can see more information on Equipment in the Setting Up Equipment tutorial.
The Edit and Save buttons allow you to edit and save the Equipment Location you are working on. You can also change the Status of the Equipment Location with the Change Status button.

| Name: | The Name of the Equipment Location. This functions as a LookUp Code for the Equipment Location. |
| Short Name: | A Short Name for the Equipment Location. |
| Status: | A system-generated field displaying the Status of the Equipment Location. |
| Type: | A system-generated field displaying the Location Type. |
| Warehouse: | A system-generated field displaying the Warehouse the Equipment Location is in. |
| Parent Location: | The Area or Zone that this Location is in. Click the magnifying glass icon to open a pop-up from which you can select the Parent Location. |
| System ID: | A field displaying the system-generated ID number for the Location. This cannot be changed, and is used only by the system itself. |
*Those in red are required fields.
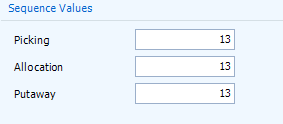
The Sequence Values for Equipment Locations automatically default to the last place when Generating Global Sequences, but you can change the values manually.
| Picking: | The Picking Sequence position you'd like this Location to occupy. |
| Allocation: | The Allocation Sequence position you'd like this Location to occupy. |
| Putaway: | The Putaway Sequence position you'd like this Location to occupy. |
Composite License Plates will be listed first, and by clicking the + icon to its left, each associated License Plate will be listed below it, displaying the same information.
| Location Name: | The Location of the License Plate. |
| LP: | The License Plate LookUp Code. |
| Status: | The Status of the License Plate. |
| Lot LookUp Code: | The Lot for the Material on the License Plate. |
| Material LookUp Code: | The Material LookUp Code for the Material on the License Plate. |
| Material Description: | A description of the Material on the License Plate. |
| Create Date: | The Date on which the License Plate was created in the system. |
| Total Packaged Amount: | The Total number of the specified Packages on the License Plate. |
| Packaging UOM Name: | The Packaging Type for the Materials on the License Plate. |
| Total Inventory Amount: | The total number of Packages on the License Plate, regardless of Packaging Type. |
| Net Weight: | The License Plate's Weight, without factoring in Containers or Packaging. |
| Gross Weight: | The License Plate's Weight, including Containers and Packaging. |
| Weight UOM: | The Unit by which the Weight is Measured. |
| Contents Owner Count: | The number of unique Owners who have Inventory on this License Plate. |
| Contents Project Count: | The number of unique Projects with Inventory on this License Plate. |
| Shipment LookUp Code: | If the License Plate is associated with a Shipment, its LookUp Code is displayed here. |
| Material Name: | The Name of the Material on the License Plate. |
| Order Class LookUp: | The system-generated LookUp Code for the Order Class of the Order the License Plate is associated with, if any. |
| Order Class Name: | The Name of the Order Class for the Order the License Plate is associated with, if any. |
| Dock Door Name: | The Dock Door at which the License Plate is assigned to. |
| Dock Door Short Name: | The Short Name for the Dock Door the License Plate is assigned to. |
| Dock Door Location ID: | The System ID for the Dock Door the License Plate is assigned to. |
By double-clicking a License Plate, you can open it in a new tab.
By clicking the + icon next to a License Plate, you can view the Inventory on it.
| LP: | The LookUp Code for the License Plate the Material is on. |
| Lot LookUp Code: | The Lot for the Material on the License Plate. |
| Material LookUp Code: | The Material LookUp Code for the Material on the License Plate. |
| Material Description: | A description of the Material on the License Plate. |
| Packaged Amount: | The number of Packages of the Material on the License Plate. |
| Packaging Name: | The Packaging Type for the Materials on the License Plate. |
| Base Amount: | The Amount of units of the Base Packaging Type for the Material on the License Plate. |
| Base Packaging: | The Base Packaging Type for the Material on the License Plate. |
| Material Name: | The Name of the Material on the License Plate. |
| Project Name: | The Name of the Project under which the Material is classified. |
| Expiration Date: | The Date on which the Material on the License Plate Expires. |
| Vendor Lot LookUp Code: | The Vendor Lot for the Material on the License Plate. |
| Vendor Lot Vat: | If a Vat was used in the production of the Material, this is the Vat LookUp Code. |
| License Plate Content Expiration Date: | The Date on which the License Plate's Contents Expire. |
| Lot Notes: | Any Notes in the system for the Lot. |
| Vendor Lot Expiration Date: | The Date on which the Material's Vendor Lot Expires. |
| Lot Description: | A description of the Lot of the Material on the License Plate. |
| Vendor Lot Notes: | Any Notes in the system for the Vendor Lot. |
| Warehouse Name: | The Name of the Warehouse in which the License Plate is Located. |
| Vendor Lot Description: | A description of the Vendor Lot of the Material on the License Plate. |
By double-clicking an Inventory entry, you are able to adjust its Quantity, add or change its Container Type, add a Reason Code for the change, and add Notes to it.
The Show By Lot box changes the displayed information, grouping by Lot.
| Item Code: | The Material LookUp Code for the Material. |
| Description: | A description of the Material. |
| Total: | The total amount of the Material in each Warehouse listed. |
| Allocated: | The amount of the Material which is reserved for Order(s) in the system. |
| Incoming Packaged Amount: | The amount of Materials that are assigned to be stored in this Location. |
| Available: | The total amount of the Material available for use in Orders. |
| Active: | The amount of the Material that is in the Active Status. |
| Inactive: | Amount of Material stored, but not in the Active Status. |
| Currently Available Amount: | The amount of the Material that has not been Allocated and is available for use in Orders. |
| Packaging: | The Packaging level of this Material. |
| Fixed Weight: | This box is checked if the Material is a Fixed Weight. |
| Owner LookUp: | The LookUp Code for the Owner of the Material. |
| Project LookUp: | The LookUp Code for the Project the Material is part of. |
| Location Status: | The status of the Location. |
| Material Status: | The status of the Material. |
| Lot: | The LookUp code for the Lot the Material is part of. |
| Item Code: | The Material LookUp Code for the Material. |
| Vendor Lot: | The Vendor Lot the Material belongs to. |
| Vendor Lot VAT: | The Value Added Tax identification number for the Vendor Lot. |
| Description: | A description of the Material. |
| Total: | The total amount of the Material in each Warehouse listed. |
| Allocated: | The amount of the Material which is reserved for Order(s) in the system. |
| Incoming Packaged Amount: | The amount of Materials that are assigned to be stored in this Location. |
| Available: | The total amount of the Material available for use in Orders. |
| Active: | The amount of the Material that is in the Active Status. |
| Inactive: | Amount of Material stored, but not in the Active Status. |
| Currently Available Amount: | The amount of the Material that has not been Allocated and is available for use in Orders. |
| Packaging: | The Packaging level of this Material. |
| Fixed Weight: | This box is checked if the Material is a Fixed Weight. |
| Owner LookUp: | The LookUp Code for the Owner of the Material. |
| Project LookUp: | The LookUp Code for the Project the Material is part of. |
| Location Status: | The Status of the Location. |
| Material Status: | The Status of the Material. |
| Lot Status: | The Status of the Lot. |
| Lot Expiration Date: | The date on which the Lot Expires. |
| Lot Manufacture Date: | The date on which the Lot was manufactured. |
| Lot Create Date: | The date on which the Lot was created. |
Only Footprint Users with a check mark in the Allow box next to their User Name will be able to work with this area.
Note
By default, Users have no check in either Allow or Deny, effectively denying them access.
| Username: | The Footprint User's username. |
| Allow: | Put a check mark in this box by clicking it to give the User access to this area. |
| Deny: | Put a check mark in this box by clicking it to prevent the User from accessing this area. |
Any fields you have set up for this section will appear here. For more information, see the User Defined Fields section.
| Last Updated: |
| 06/06/2025 |
Copyright © 2025 Datex Corporation