Edit a material
If you possess the needed permissions for Footprint Portal, you can make some limited edits to an existing material. Certain options, such as whether or not it was lot controlled or fixed weight, can't be changed if there is any inventory for the material in or coming into the warehouse. Packaging levels can also be added to a material record if there are multiple, and their dimensions updated.
Option A, Step 1: Open the Materials hub. If the material you're looking for is not immediately visible in the grid, input the material's lookup code in the search field on the top right corner of the Materials grid then either click the Tab key or click outside of the field. The material will be

Option A, Step 2. If you have access to more than one owner and/or project, ensure the Owner and Project set are the combination the material is assigned to. If not you may need to clear the fields and set to the required owner and project.
Option A, Step 3. If the material you're looking for is not immediately visible in the grid, input the material's lookup code in the search field on the top right corner of the Materials grid then either click the Tab key on your keyboard or click outside of the field. The grid will be filtered to contain all records matching the value you entered.
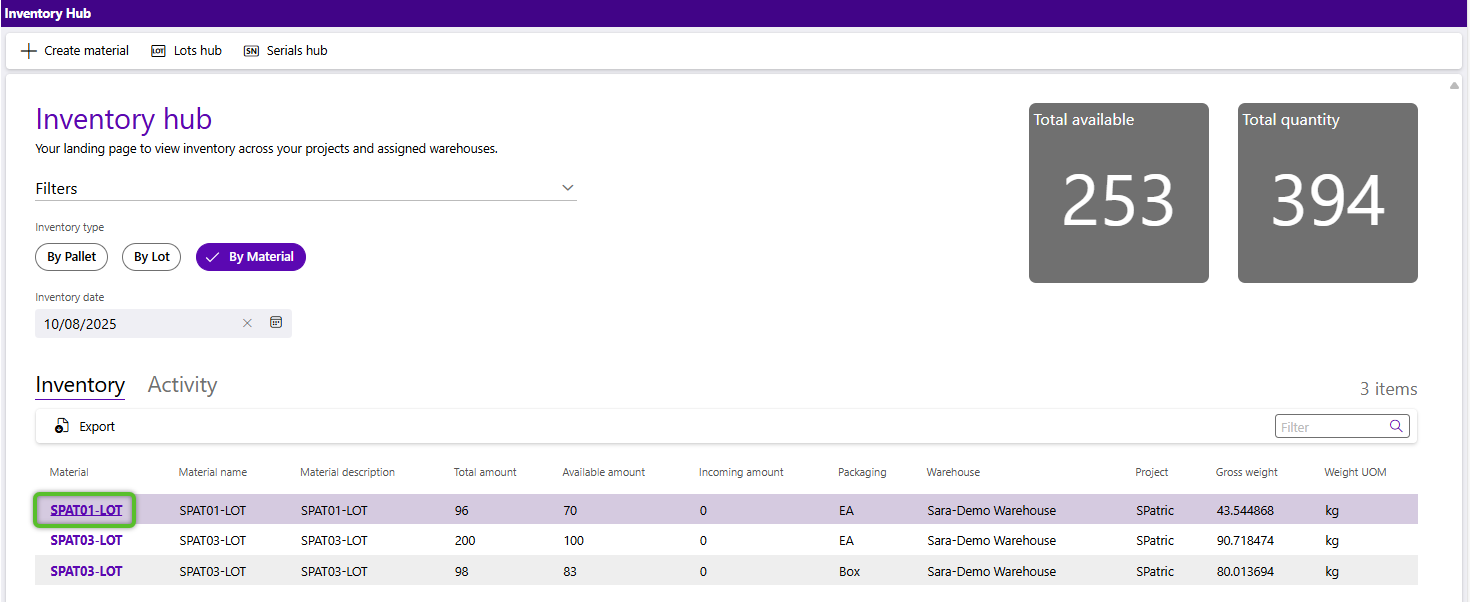
Option B: Click on the material's lookup code in any grid where it appears as a hyperlink. This isn't just limited to the Materials hub. You may find such hyperlinks in orders and the Inventory hub.
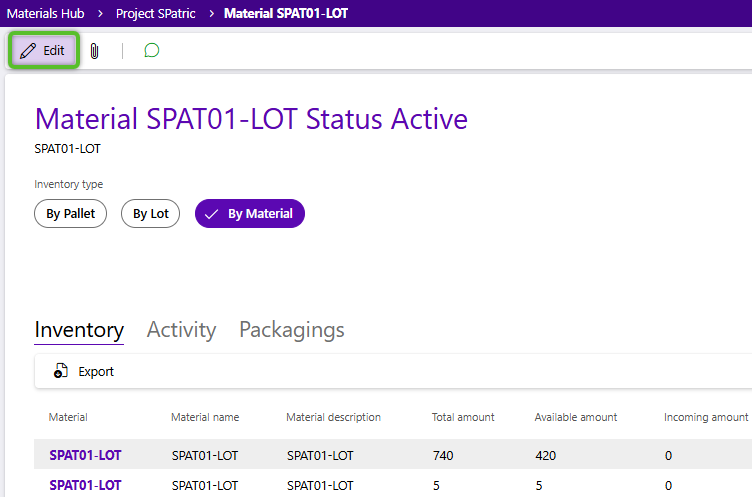
1. In the material record, click the Edit button to open the Edit material flyout.
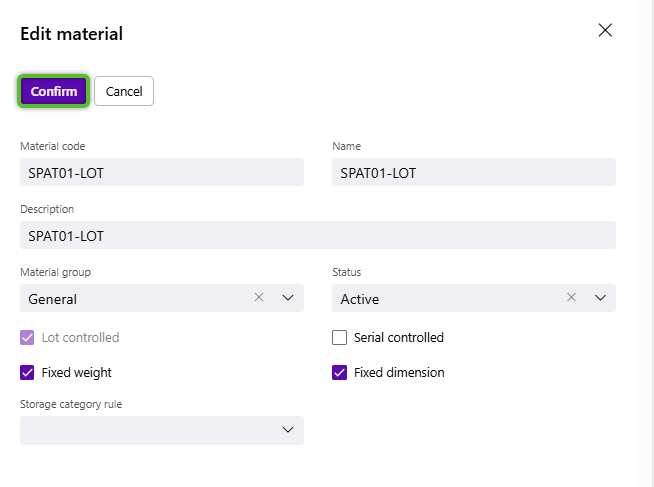
2. Edits can be made to most of the fields with the exception of the Lot controlled, Serial controlled, Fixed weight, and Fixed dimension. If there is inventory for the material in the warehouse or expecting in the warehouse on an incoming receiving order these fields cannot be updated until there is no inventory. If changes have to be made you may need to work with the warehouse to perform an inventory transformation on the existing inventory.
3. Once you've completed all the edits required, click the Confirm button.
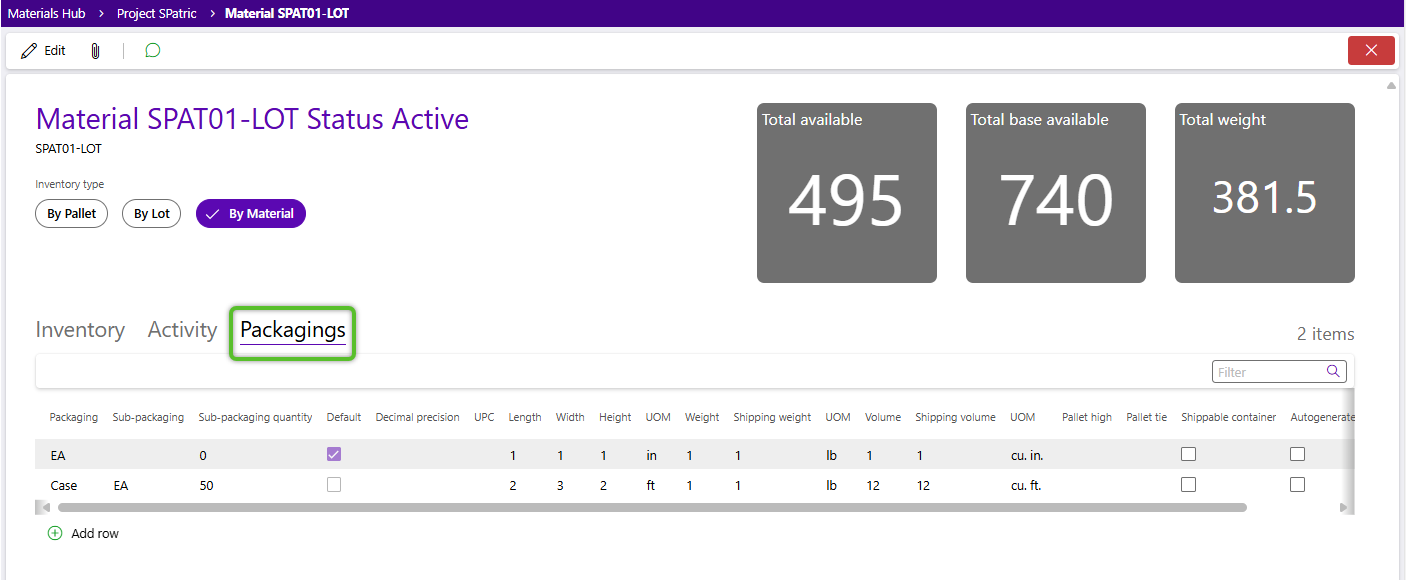
1. In the material record, click the Packagings tab.
2. Click the +Add row button.
3. Select the Packaging name from the drop down. These are pre-populated values. If the one you are looking for is not available you may need to contact the warehouse to have it added.
4. After selecting the packaging identify the packaging level for the material that is directly below the new level from the Sub-packaging drop down, and indicate the amount of that packaging that would be inside in the Sub-packaging quantity.
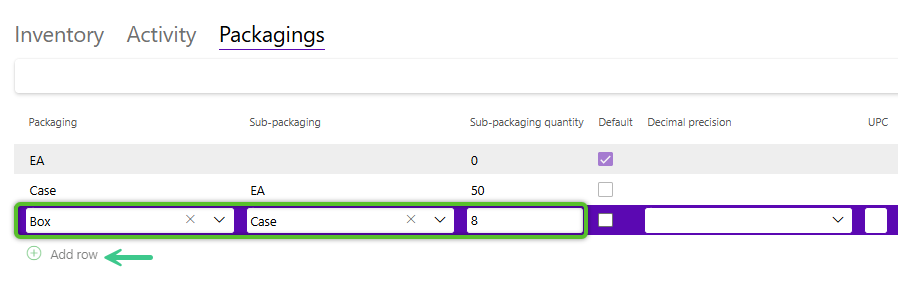
5. (Optional): Set Decimal precision for values of this packaging level and the UPC (Universal Product Code) for this specific packaging level of the material.
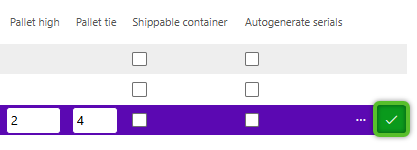
6. If the material has set measurement values (weight, volume, and dimensions) provide the values for each as applicable.

7. (Optional): Enter a Pallet high (how high this material packaging level can be stacked) and Pallet tie (how many packages of this level can fit on a pallet before stacking).
8. (Optional): Select if this is a Shippable container (it can be shipped without being packed), or if the material was serial controlled if this packaging level should Autogenerate serials.
9. Click the check mark at the end of the row to save the new packaging.
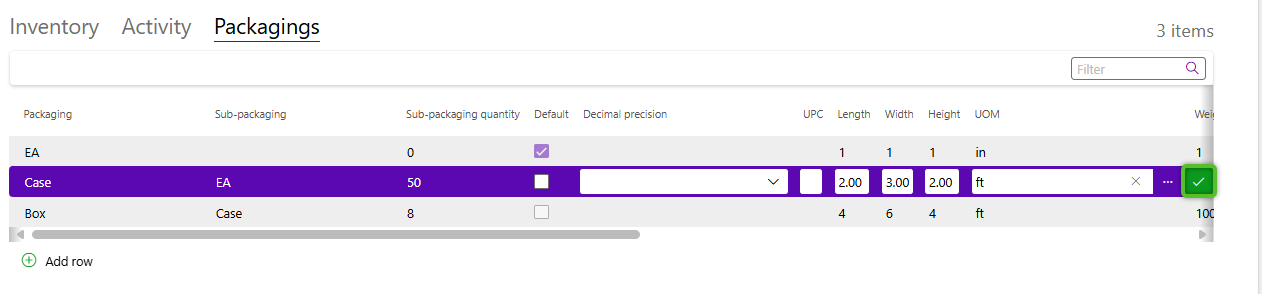
1. In the material record, click the Packagings tab.
2. Click on the row for the packaging you wish to edit. The row will become editable and you can make your changes with the exception of the Packaging, Sub-packaging, and Sub-packaging quantity fields.
3. Once you've completed all your changes, click the check mark at the end of the row.
| Last Updated: |
| 10/08/2025 |
Copyright © 2026 Datex Corporation